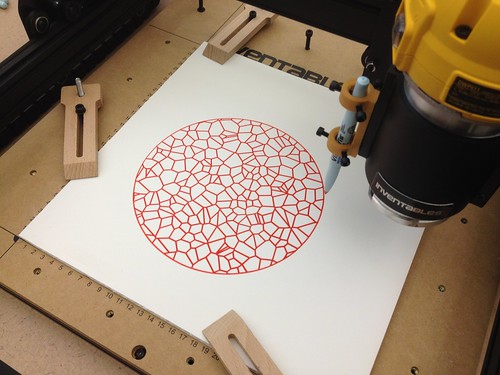
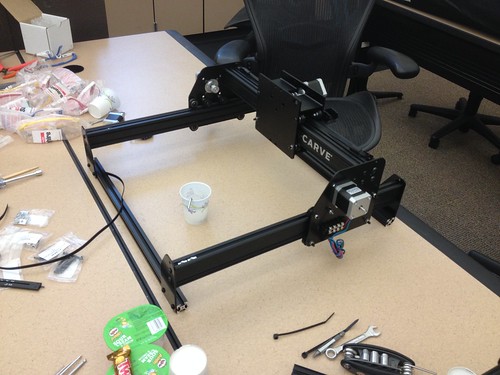
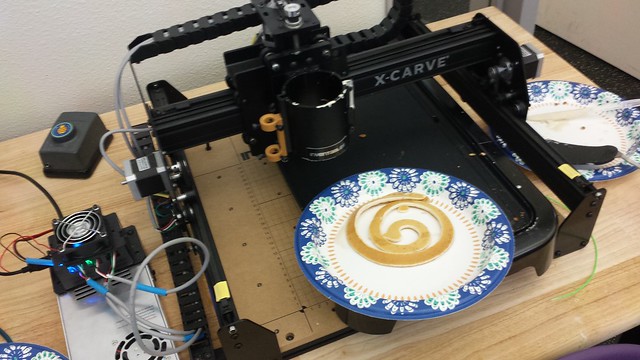
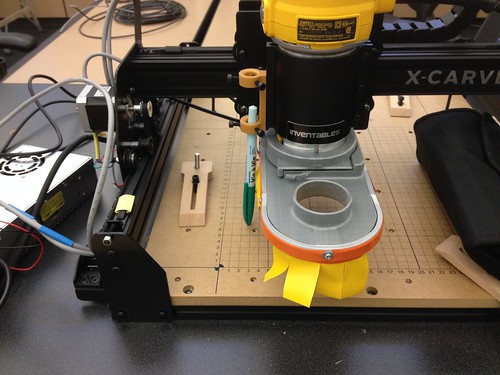
With the floors finished, things are finally getting a little bit closer to normal in the makerspace.  Moved the X-Carve from the clean lab to the dirty lab, and tested out cutting some HDPE in preparation for a mosaic tile project.

X-Carve Carving HDPE (Finally)

Lessons learned:

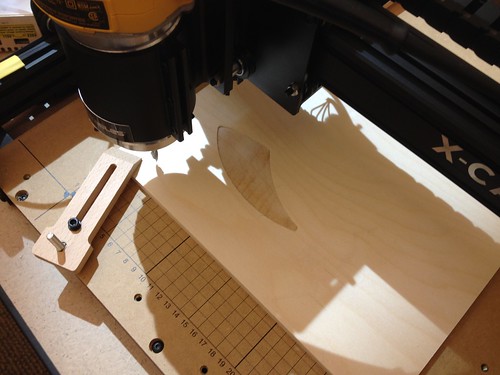
  • Slowest router speed is best – less fuzz.
  • Even at the slowest speed, there was plenty of fuzz that needed to be cleaned up with an X-Acto knife.
  • Pause at your own risk. I paused the cut out of courtesy to the Data Science club, and the job never recovered. When I tried to restart, the X-Carve ignored my pleas. After a while I gave up, and tried to re-run the job using the previously established zero.  Things went bad quickly. Easel didn’t seem to care about my prior zero setting, and charged forward, about 6 inches off the mark. I ruined the in-progress HDPE blank, and shaved a little bit off of the waste board besides.

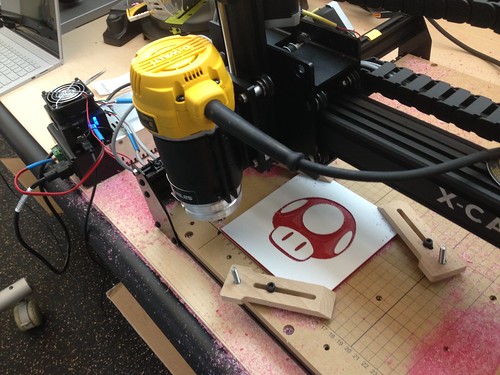
Even with those minor hiccups, I’m loving the final result!

X-Carve Carving

We don’t have dust collection set up just yet, so running the router on the new X-Carve is a messy prospect.  Max Mahoney (Chemistry) has ideas about using the machine for some copper etching labs, so we set about adapting it for a pen.  We fairly quickly found a model of a 3D printable pen holder for the X-Carve (CC BY Duane Northcutt), and printed it out, tapping the holes for M4 screws. PLA surprisingly seems to hold a thread fairly well.

X-Carve Pen Holder

After several experiments with various pens, we were able to successfully draw a pleasing circular Voronoi tessellation using an orange Vis-a-Vis overhead transparency marker on 12″ x 12″ piece of foam core board.

X-Carve - Pen on Foam Core

The whole thing took about 36 minutes to complete.  Here’s a short, mesmerizing (to me anyway) video of the CNC hard at work.

The build crew met again this morning for the third and final X-Carve build day.

Untitled

Finished up the work area, z-axis, drag chains and final wiring…

Untitled

After a few perplexing challenges, especially regarding the mounting of the y-axis drag chain, we were able to finish the build, fire the machine up, and make our first test cuts!

Very First Cut!

All in all, a very satisfying build, and we learned a lot. For anyone looking to build an X-Carve, I would advise double-checking the forums at Inventables if you run into inconsistencies in the instructions – there aren’t many, but there are one or two differences between the current shipping kit and the videos and build instructions online.  I would also advise using the GrabCAD models. We ignored these until the very end, but they proved very useful when figuring out the drag chain mounting, and I wish we had checked them sooner – we pretty much ignored them until the very end of the build.

Potato quality video – I was holding the vacuum in one hand and trying to shoot video with the other, and apparently the iPhone didn’t know upon what to focus):

In the next couple of days, I hope to get the dust extraction situation worked out, and to extend the XYZ wiring so that the power supply can live a little farther from the machine.

X-Carve Build Day, Part 1

X-Carve Build Day, Part 2

Build photos

X-Carve Build Day 2 - All Hands on Deck

Back to the build…  After a successful build day last week, we started Build Day 2 with some goodies, including Diane’s home-roasted coffee, egg and cheese sandwiches, homemade scones, muffins and pastries:

X-Carve Build Day 2 - A Light Brunch to Start the Day Right

Today didn’t go quite as smoothly as I’d hoped, mostly because I mistakenly believed that one of the rails had not been tapped, which triggered a mad dash to the local hardware store for a tap and die set that turned out to be unnecessary. My mistake transformed into a learning experience and some skill building, so it wasn’t all bad:

X-Carve Build Day 2 - Jennifer Drilling

We were able to get the Z-axis assembled:

X-Carve Build Day 2 - Jennifer Adjusts the Z-Axis Drive Screw

And all of the motors wired:

X-Carve Build Day 2 - Diane and Jennifer Wiring the Z-Axis

We’re planning on finishing up the project after the weekend, and then we’ll get to carving!

X-Carve Build Day 2 - Max Wiring

Additional photos…

X-Carve Build Day - Chopsticks and Scissors

Spent much of today with a few of my primary collaborators: Diane Carlson (bottom left – she of Making Social Change fame), Max Mahoney (top left – he of molecule making and molecular visualizer fame), Jennifer Kraemer (top right, she of various making in ECE projects like the building system interoperability activity) and me (bottom right) putting together the new X-Carve.

Jennifer fine-tuning a pulley for the Y axis:

X-Carve Build Day - Fine Tuning

Diane and Max strategizing:

X-Carve Build Day - Diane and Max, Getting it Done

We ended the day with most of the structure built, and will meet again next week to tackle the belts and electronics.

X-Carve Build Day - A Day's Work

More photos from the X-Carve build day…

On Halloween this year, we hosted a potluck in the Innovation Center. Music, pumpkin carving, and a couple of experiments, including turning the X-Carve into a pancake machine. We went with a low tech approach, simply replacing the router with a squeeze bottle and relying on thin batter and gravity to keep things flowing.

X-Carve: Pancake Maker

We also laser etched Nova (our space bunny mascot) onto a pumpkin, which turned out surprisingly well!

Laser Pumpkin

Laser Etched Pumpkin

Spent the better part of today building – or starting, anyway – the Rostock Max v3.  There’s tremendous cultural and social value in having folks take ownership of their tools.  We ordered this 3d printer in DIY kit form specifically so that we could build it together, following our successful building/bonding experience putting together the X-Carve (part 1, part 2, part 3).  Champion maker educators Diane Carlson (Sociology), Jennifer Kraemer (Early Childhood Education), and Max Mahoney (Chemistry) were were joined by students Nathaniel Adams, CJ Costa, and Alex Hartigan.

It sometimes takes a while to get rolling on a complicated build.  I’ve learned that one of the best ways to kick things off is to get all the participants doing something communal and simple, so we started by collectively picking out all the little bits left over from the laser cutting process.  A low risk/high reward opportunity for the group to gel, visit, socialize, and quickly develop a common purpose.

Rostock Max v3 Build Day

This kind of social busywork seems to scratch some shared primate itch, and reminded me of my favorite moment from last summer’s Making Across the Curriculum workshop, during which folks gathered around to chat and pick the protective paper off of Diane’s Wheel of Voting Rights project.

Collective Grooming - Picking the Sticker Residue off a Laser Cut Piece of Acrylic

That finished, we loosely divided up the work and got to building.  With this particular build, there are a lot of steps that can be completed independently and in no particular order – in other words, not a lot of serial dependencies – so folks were able to dive in and work in pairs and trios without (usually) having to wait for others to finish.  Despite a few missing parts (which turned out not to be missing after all), we made a good start, and will continue building later in the week.

Build day album on Flickr…

Wendy and Mike Appleby teach at Georgetown School in Georgetown, CA, where they’ve been developing the Georgetown Makerspace and associated programs.  They’re starting a new gear-up phase, so I invited them to visit the Innovation Center the other day.  They brought their son Sam, and we did some 3D printing, cut some stickers on the vinyl cutter, and set up a plotter job on the X-Carve.  We talked about different ways we might work together, and decided on a “sister lab” concept.  We kicked around some ideas for a partnership plan, to include sharing information and resources,  maybe collaborating on some training, and hopefully hosting Georgetown School students for field trips and work days once our space is built out.

Measuring with Sam

I work chiefly with adults, and it never ceases to amaze me how very competent some children are at using digital tools.  After a brief introduction, Sam quickly figured out Tinkercad, and designed some sweet accessories for his action figure, though it took a few rounds of prototypes to get the scale right.  Applied mathematics!

The dust shoe I mentioned in a previous post for the X-Carve printed nicely over the weekend, and today I had some time to assemble it and get it installed.

Dust Shoe Printed

The instructions called for a strip of vinyl to use as the skirt for the shoe. It pays to be obsessive about hoarding things that might contribute to projects, and I remembered that I had squirreled away several feet of multicolored vinyl, from where I can’t remember. I fished around in the parts area, which is filled with old printers, pieces of foam and plastic, metal brackets, and the like, and found it. Though there’s nothing in the photo for scale, but suffice it to say that the crumpled pile below represents A LOT of vinyl – probably 8′ or 10′ x 4′ of it?

About 7 Feet of Colorful Vinyl (Nothing Whatever for Scale)

I cut a strip from the bright yellow scrap, and installed it on the shoe, then installed the shoe on the router. Tomorrow I hope to have time to actually turn the machine on (in router mode, rather than in plotter mode) and see how it works!

X-Carve Dust Shoe

Happiness is a full parts bin.