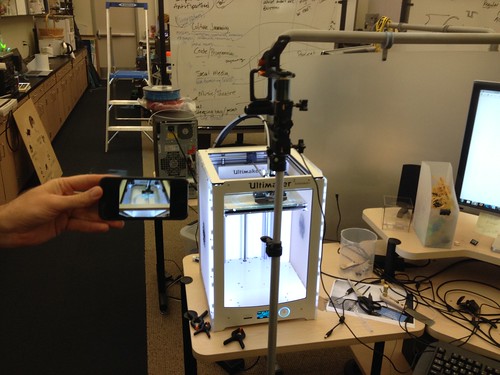
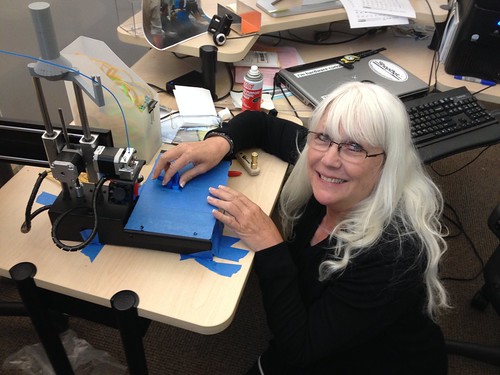
Finally had the chance to set up the new Form 2 and give it a go.  Met Max Mahoney (Chemistry) in the Innovation Center and we walked through the quick start guide.

Untitled

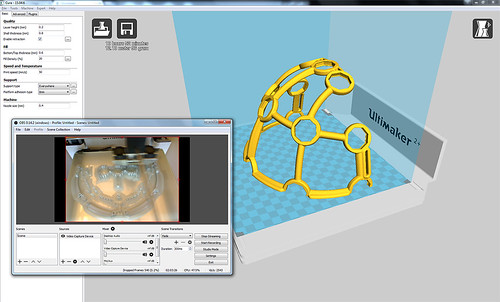
Once we got our head around the setup and leveling, we set up a print job. Originally, we planned to print Max’s molecule, but decided instead to try a set of some small parts from the OpenBCI headset.  The software complained about some problems with the STL files, and then offered to automatically fix them, so we allowed it to.

Untitled

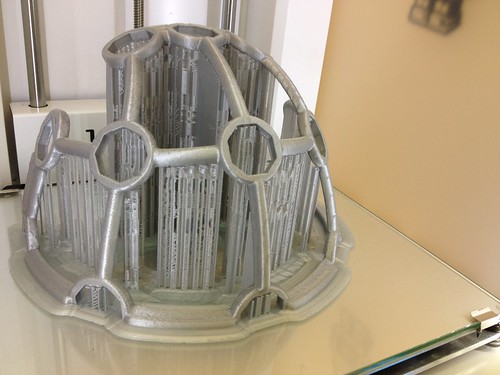
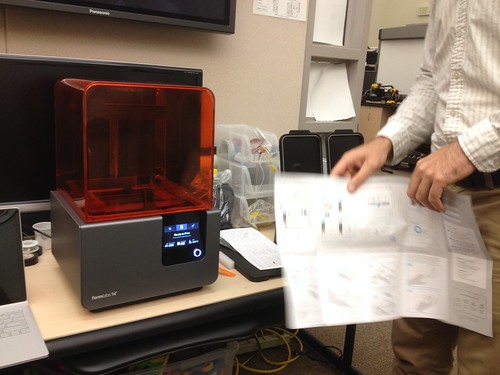
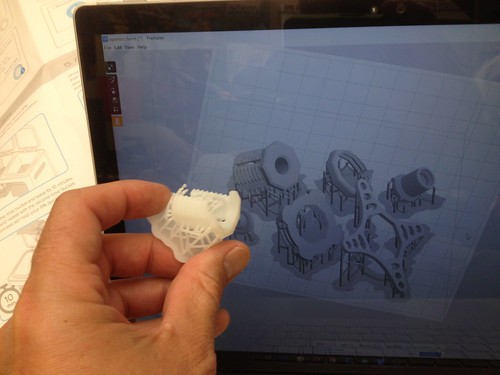
The Form 2 has an interesting way of laying out objects, placing them all at a jaunty angle and adding a bunch of lattice-like scaffolding for support.  There was a slight hiccup with the firmware update, but that was solved after a message to the Form 2 support folks.  The solution was to download the new firmware and then select it, rather than letting the software automatically do that.  Suggestion to FormLabs: Put a link to download the latest firmware on your support site, which would save calls/emails to support personnel.

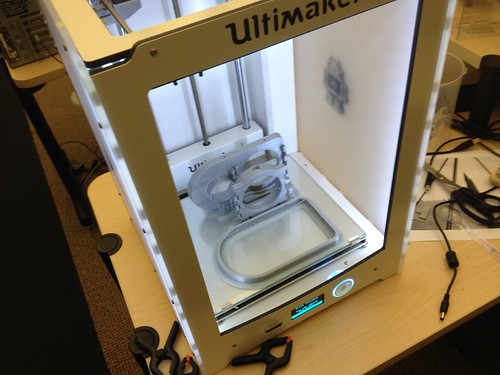
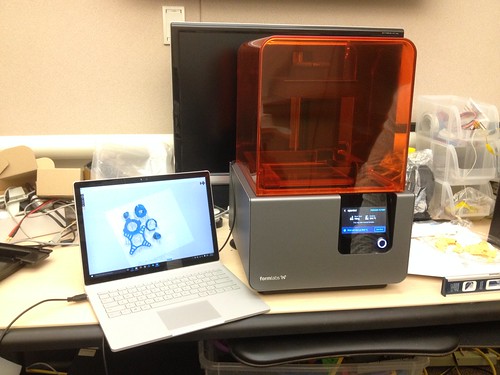
Anyhow, the printer has a nice touchscreen interface, and navigating various functions is generally intuitive, though the network information – the printer can connect via Wi-Fi (admittedly in Beta) and Ethernet – is spotty and could use some work.  Specifically, there don’t seem to be any diagnostics or deeper information about network connectivity, or a way really to know that the machine is able to get out to the Internet.  In our college network environment, those kinds of diagnostic tools are crucial, as it is essentially a nightmare to get any device connected to the network.  After connecting an Ethernet cable, the only information available was that the Form 2 received an IP lease.  On the Wi-Fi side, I was not able to manually enter the name of the one hidden network available at the college that uses authentication simple enough to allow connection of strange devices.  Finally, there doesn’t seem to be a way to trigger the leveling process except to wait for the machine to squawk about being out of level.  It would be nice to be able to just trigger that process from the menu system.  I hope those issues can be addressed at some point, but we were able to work around them and get the first print job uploaded.

Untitled

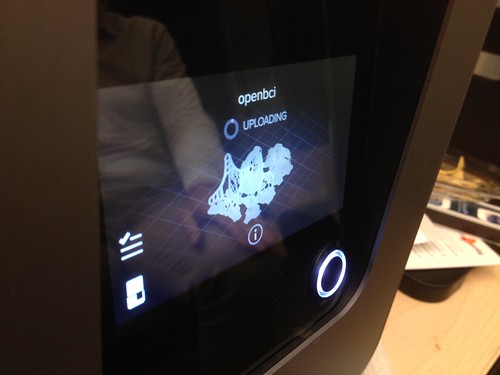
The printer ran the job, taking about 2.5 hours, and I streamed it live via the OpenBroadcaster setup.  Post processing takes some getting used to, and involves nitrile gloves and bathing the parts in isopropyl alcohol at the finishing station.  The print was a mixed success – some parts printed fine, and others were less than complete.  My suspicion as that the “automatically fix the files?” part of the process didn’t actually work properly.

Untitled

I do quite like that the printer sent me an email when the job was completed.  My plan is to fix the files prior to importing them into PreForm, and then run the job again to try and get a better result. All in all, not bad for a first go, and we learned a lot about the process. Always be prototyping!

Sean Fannon (Psychology) and I secured a small grant to get our hands on an OpenBCI, which is an open source brain-computer interface, complete with a headset that can be printed on a 3D printer.  Sean plans to use the device to enable students to do some fairly sophisticated brain research.  Fortunately, the new Ultimaker 2+ Extended has a sufficiently large build envelope, so I set it up to print half of the headset overnight, and watched it on YouTube in an obsessive way using the Open Broadcaster setup.

Printing OpenBCI Mark III

Came in this morning, and it all seems to have printed well. In what is a first, I think I might not have enough PLA on the spool to finish the job.  Unfortunately, the Ultimaker uses the fat stuff (2.85 mm), and the Printrbot uses 1.75 mm, which I’ve got a lot of. I read somewhere that the Ultimaker can be tweaked to run the smaller filament, so I might just have to give that a shot.  Some of the smaller bits I plan to use to test the Form 2 that should arrive some time in early July.

OpenBCI Ultracortex Mark III

The dust shoe I mentioned in a previous post for the X-Carve printed nicely over the weekend, and today I had some time to assemble it and get it installed.

Dust Shoe Printed

The instructions called for a strip of vinyl to use as the skirt for the shoe. It pays to be obsessive about hoarding things that might contribute to projects, and I remembered that I had squirreled away several feet of multicolored vinyl, from where I can’t remember. I fished around in the parts area, which is filled with old printers, pieces of foam and plastic, metal brackets, and the like, and found it. Though there’s nothing in the photo for scale, but suffice it to say that the crumpled pile below represents A LOT of vinyl – probably 8′ or 10′ x 4′ of it?

About 7 Feet of Colorful Vinyl (Nothing Whatever for Scale)

I cut a strip from the bright yellow scrap, and installed it on the shoe, then installed the shoe on the router. Tomorrow I hope to have time to actually turn the machine on (in router mode, rather than in plotter mode) and see how it works!

X-Carve Dust Shoe

Happiness is a full parts bin.

Max and I spent some time in the shop this afternoon, brainstorming Chemistry activities that will make use of the new X-Carve and vinyl cutter, and working on the new Ultimaker 2 Extended+ that arrived the other day.  After some tweaking, we got the printer running, and decided to print this Dewalt DWP611 Thread-On Dust Shoe from Thingiverse (CC BY Noah Mackes).  Up until now, we’ve been using the X-Carve as a plotter, but Marisa Sayago (Professor, Art) and I have been talking about some printmaking ideas that involved cutting and engraving, hence the need for the dust shoe.

The printer reported that the job was going to take 17 hours, so Max and I decided to set up a webcam and do some R&D on Open Broadcaster Studio, which I have been considering using for the live fishcam that will be part of the aquaponics project.  We installed the software, plugged in the camera, put in the YouTube live streaming information, and it all worked perfectly right out of the gate.

Streaming Video of Ultimaker 2 Extended+ Printing Parts for an Inventables X-Carve

By the time I got home, the camera had slipped or been knocked sideways, but the print is still visible!

Open Broadcaster Streaming Ultimaker 2 Extended+ Printing a Dust Shoe for an X-Carve to YouTube Live

I’ve been working with technology for many years, but the idea that I can relatively easily monitor from home a 3D print job of a part I need and was able to download for a CNC machine that can be used to support (among other things) hands-on student activities in Chemistry and Art, while simultaneously testing a software program and a streaming service for another project that combines Library, Chemistry, Biology, Theater Arts, fish, and plants is, frankly, pretty neat.

I almost forgot – I made a Voronoi Totoro on the X-Carve (in plotter mode):

Voronoi Totoro

We don’t have dust collection set up just yet, so running the router on the new X-Carve is a messy prospect.  Max Mahoney (Chemistry) has ideas about using the machine for some copper etching labs, so we set about adapting it for a pen.  We fairly quickly found a model of a 3D printable pen holder for the X-Carve (CC BY Duane Northcutt), and printed it out, tapping the holes for M4 screws. PLA surprisingly seems to hold a thread fairly well.

X-Carve Pen Holder

After several experiments with various pens, we were able to successfully draw a pleasing circular Voronoi tessellation using an orange Vis-a-Vis overhead transparency marker on 12″ x 12″ piece of foam core board.

X-Carve - Pen on Foam Core

The whole thing took about 36 minutes to complete.  Here’s a short, mesmerizing (to me anyway) video of the CNC hard at work.

Students in Jennifer Kraemer’s ECE 312 – Child Development class had the opportunity to explore interoperability of proprietary building systems, with a little help from 3D printed interface pieces.

A Lesson in Interoperability

LEGO + Tinker Toys. Why not?

LEGO + K’NEX + Tinker Toys + Lincoln Logs… why not?

Lincoln Logs + LEGO + Tinker Toys.

Making doesn’t (and shouldn’t) end in High School.

Photos by @jenniferkraemer

Helping students rig the balloon, with the 3D printed picavet in the foreground:

Preparing for Launch

Lowering the rig to clear the canopy:

Bringing the Balloon Down to Clear the Canopy

Nothing better than doing real science in the field with students (plus wearing a sweet safety vest):

Dowell and Pittman: Men of Science

Additional photos and datasets at the project blog dolookdown.org

FLC's Garden From Above

Field day with Jason Pittman’s (Geosciences) mapping class yesterday. We flew the 3D printed picavet for the first time. After we worked the wetlands, two student volunteers agreed to walk the balloon up into campus, as I wanted to get shots of the garden. That little patch of green in the dry area (above) is the garden. Image below from a different flight for comparison.

FLC's Garden as Seen from Above

The entire dataset can be found at the project blog (DoLookDown.org), as well as the images from our 2014 and 2015 flights of the same area.  When I find the time, I plan to redesign and 3D print the picavet from the ground up, shaving some additional weight.

Jennifer Kraemer (ECE) Removing Support Material from 3D Printed Parts from the Free Universal Construction Kit

Jennifer Kraemer (Early Childhood Education) was in the lab today, printing up some new connector pieces from the Free Universal Construction Kit.  I used the K’NEX-to-Lego connectors in a workshop over the summer, and Jennifer is planning on printing many more pieces for use next week for activities with her ECE students.

Jennifer Kraemer (ECE) Printing Parts from the Free Universal Construction Kit

Side note – I’ve been really impressed with the performance of the Printrbot Simple Metal. It’s been getting a fair amount of use lately, with the aquaponics nozzles and Max’s molecules and molecular visualizer and the picavet parts, and it just seems to go and go without being fussy. That said, I have my eye on a Formlabs Form 2. I’m especially interested in the castable resin. It would be great to get a metal pour going in the fall!