
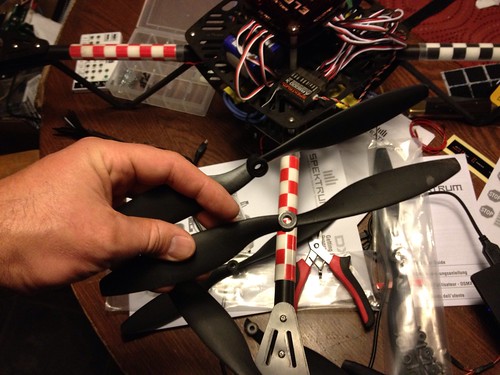
Can you guess what the problem was? I feel a bit foolish, but realized after much fussing and tweaking of settings that the kit contains two kinds of props: clockwise ones, and counterclockwise ones. I had three out of four correct, merely by accident, but once I replaced the errant one, I took the quad out into the night for just a basic spin up. Result: the roll problem is, of course, gone. Foolish though the mistake may have been, I’m reporting it here in the hope that someone might stumble upon it and learn from my errors. Tomorrow, we fly!
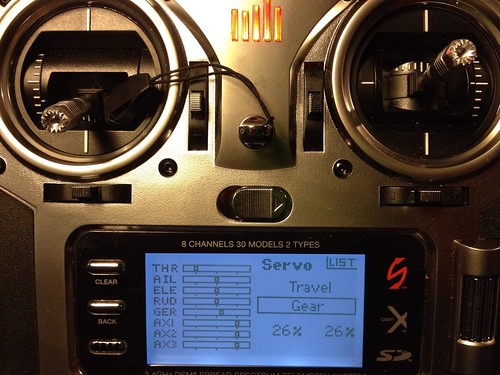
See that 26% setting? I think that’s what’s going to make this work. Taking a step back, I’ve been struggling all day with takeoff, one a surprise, the other a genuine break-the-prop failure. The craft seems to want to roll to the left when I hit the throttle.
After breaking two props, I suspended the ELEV-8 from a tree with a bit of twine, and was able to confirm that in fact, at full throttle, it would just flip itself over. I believe the problem has to do with setting a particular value in the Gear setting, and even though I read a bunch of forum postings and also the DX8 manual, I only now understand (I think) what needs to be done. Tomorrow, I hope to have a successful takeoff!
After buttoning up the wiring and top plate, took the quad outside to a flat spot and gave it a go. The props seem very uneven, with the right front one having more pepper than the others, and at full steam, the copter lurched to the left and I broke another prop. I think this is to be expected.
Progress sometimes – often? – involves breaking things. I spent the better part of the day getting the quadcopter talking to the transmitter, and just when I thought I had things figured out, the beast angrily leapt from the table and crashed onto the floor, breaking a glass, severing one of the leads on my tester, and in the process shattering one of the props and embedding the broken end in a roll of duct tape.
This is progress! I’ve since removed the props until I can figure out exactly why the surge of aggression. I’ve got lots of props, so hopefully I can get through the early stages of the project with an intact quadcopter and all of my fingers.
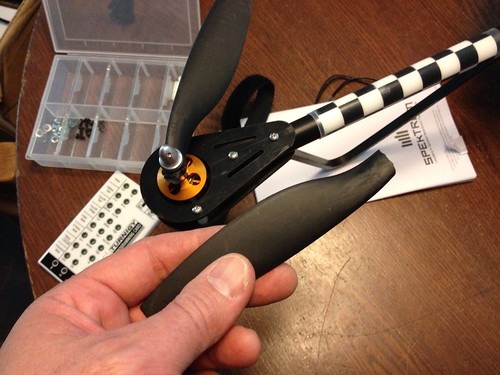
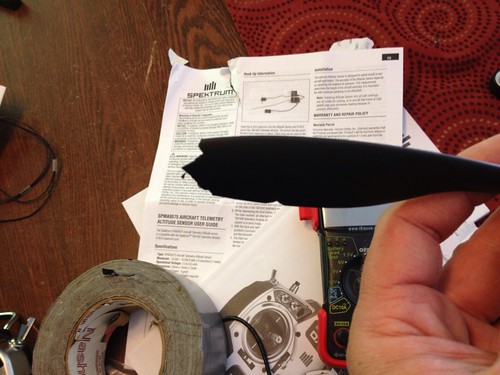
Finished with the LED wiring, which for whatever reason was a total pain, and then set to work on the wiring harness to connect the battery to the ESCs and other powered components. It took quite a long time, but I’m happy with the result. I added two JST connectors – I need to update the diagram to reflect two connectors instead of one – which will power the LEDs and the video transmitter (which hasn’t yet arrived) for first-person flight. Next up is a procedure to make sure the propellers spin in the appropriate directions – two clockwise, two counterclockwise. That procedure, however, requires the battery, which has yet to arrive.
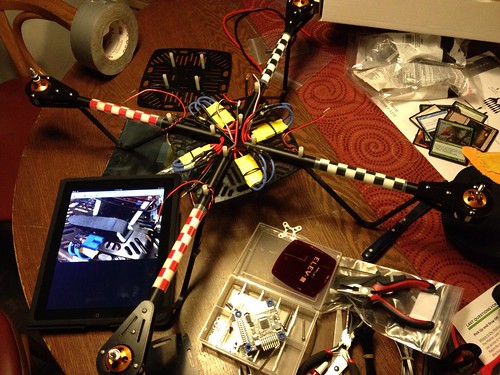
The first of two quadcopters is coming along. I’ve got the booms and frame assembled, and just need to work on the wiring harness before putting the top on. As is always the case with projects, there are things that I would have done differently, but they are mostly minor things, and I can use what I’ve learned as I start the second build.
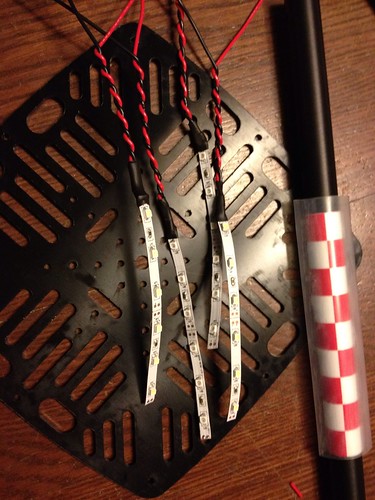 These LED strips should make the copter more visible from the ground. I soldered the leads, then put some heat shrink on there to keep things neat.
I’m not entirely sure how I’ll connect these up, but since they’re 12 volt, I will probably just integrate a pair of wires on a JST connector into the soon-to-be-built power harness. Now that I think about it, I’ll need another pair for the video Tx. I suppose that means I’ll have to update the diagram.
That’s it for today…
Brought many of the parts for the project home – it’s much easier for me to work in my shop, where I have all of the tools and ventilation that I need to work efficiently.
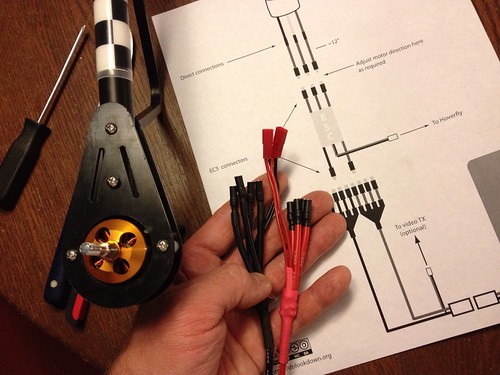
Spent a couple of hours soldering wires and EC3 connectors – these are little gold bullet type connectors – to the Electronic Speed Controls (ESCs) and motors. Lots of fiddly cutting, soldering, and twisting of wires, but I made good progress, finishing all 8 of the ESCs and enough motors for one of the ELEV-8s. I may just push through and try and get the rest of the motors wired up, as once this task is completed I can set to work assembling the airframe.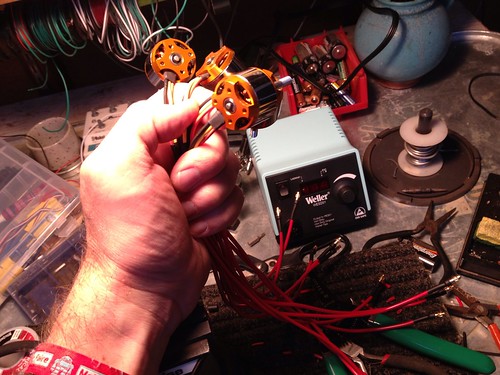
Still waiting on the batteries, video transmitter and POV camera – hopefully that stuff will show up next week some time.
To me, anyway.
After visiting with Nick yesterday, I crafted this diagram in an effort to make sense of the build and the steps to wiring up the booms:

I’ve never worked with EC3 connectors before, and the kit is lousy with them, so I watched this video to figure out how to work with them, and specifically to figure out how the little metal bits snap into the blue connectors. The trick seems to be to push them in when they’re still hot from soldering.