The Innovation Center is collaborating with folks from the Equity Center, the PEAC²E (Peer Engagement for Achievement, Culture, Connection and Excellence) program, and Diane Carlson (Sociology) on a Peace Pole project. One of the many ideas that has emerged from the collaboration is to create a modular mobile “peace pole platform,” essentially a design specification and a set of affordances that will enable members of the college community – disciplines, student groups, classes, anybody – to create art and interactive content for display.

Peace Pole Platform Prototype Planning

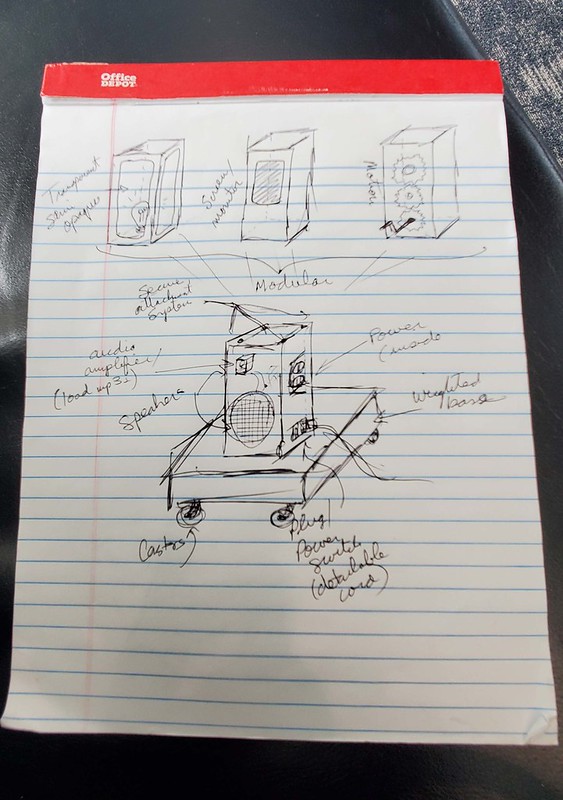
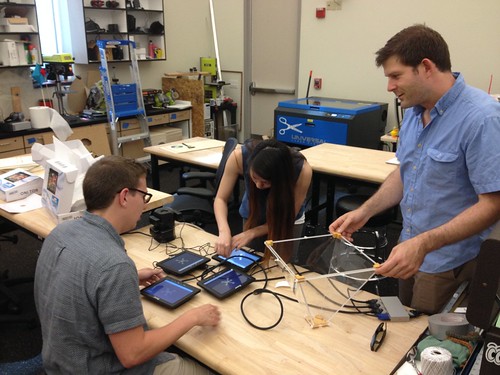
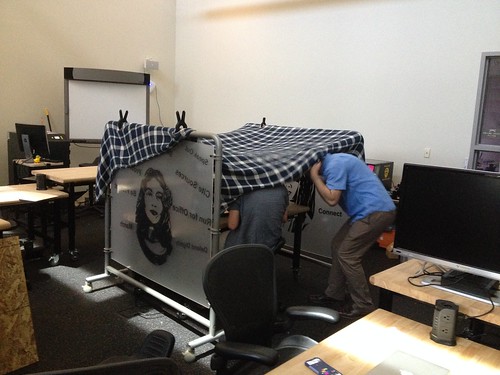
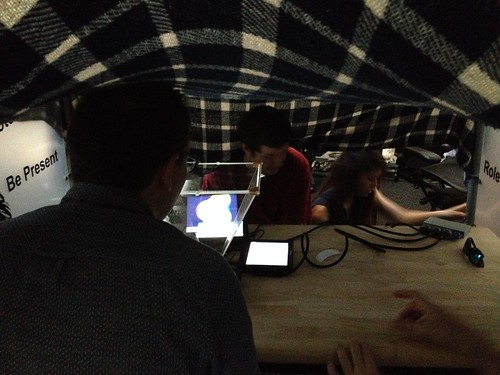
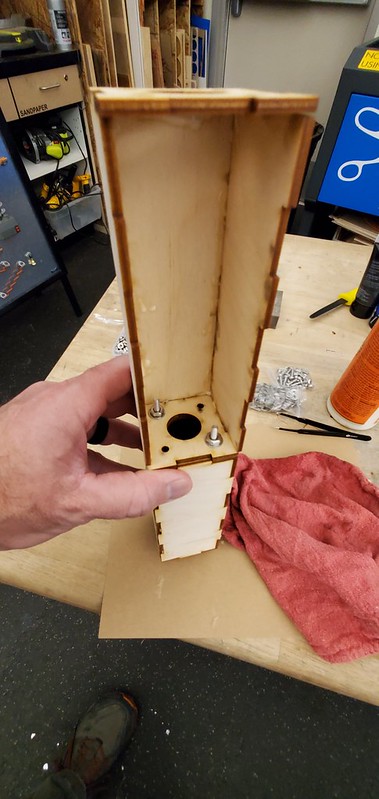
Spent the day yesterday in the Innovation Center (I love having the lab to myself and locking in to the rapid prototyping flow), crafting a 1/4 scale prototype of the mobile modular peace pole platform prototype (M²P⁴?), and in particular exploring how the segments will connect. Nothing especially revolutionary about the basic design; each segment is a simple 12″ x 24″ rectangular box (our big laser has a cutting area of 18″ x 32″), and the pole itself will be three of these bolted together in a concealed way.

2022_peace_pole_quarter_scale_prototype

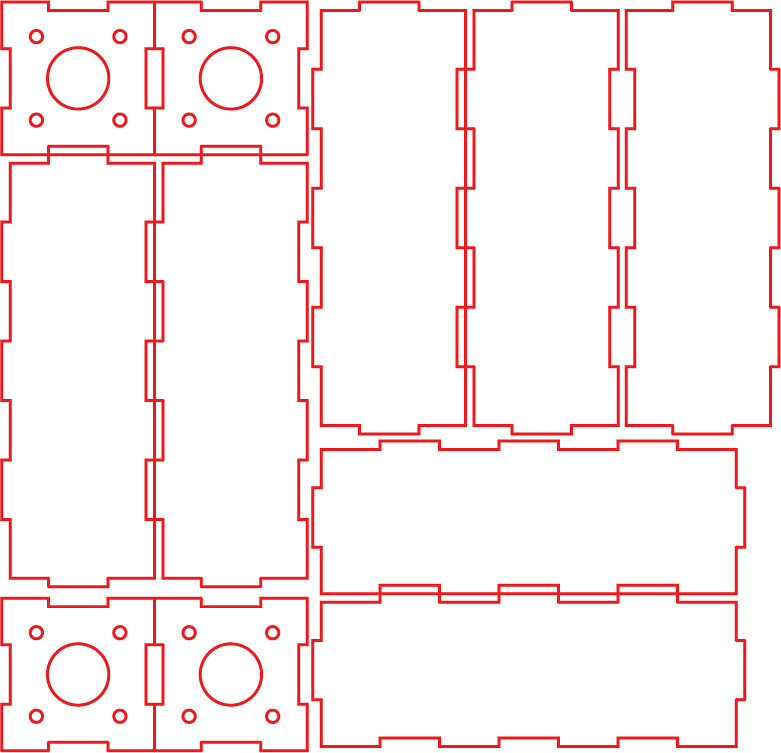
The big circle in the middle of each end piece (Illustrator file above) is the access port, and so I think I’ll be able to reach in and connect them together with bolts. There are other ways of creating access panels from the outside – I’m thinking magnetic – that I might explore just to make the connection process simpler.

20221210_135159

Three of these stacked will be about 6′, and provide 12 possible faces for art and expressions of peace.

20221210_140207

Version 1.0 will be “static” – crawl, walk, run – but the long-term goal is to have the base of the unit equipped with power, sound, and a Raspberry Pi or similar, such that folks have a set of givens they can design for. Think lights and sensors and haptics and interactivity. Two peace poles communicating at a distance? A receipt printer that provides folks with a prayer for peace they can take with them? Lots of possibilities!

Toward the end of last semester – after lengthy and vigorous and unflinching hacking of red tape – we offered the first workshop – Beer Science: Measuring Beer Bitterness – as part of our ongoing Fermentation Science efforts. We started the day in the Chemistry lab, where Max Mahoney (Chemistry professor and makerspace faculty champion) described the chemistry of beer, and led students through a procedure for measuring beer bitterness.

20181109_122745

Here’s how Max describes it:

The goal of this workshop was to expose students to a quantitative and qualitative analysis of beer bitterness. The chemistry of hops and bittering compounds was presented along with a discussion of the chemical procedures involved in this analysis. The following procedure was used to quantitatively analyze beer bitterness. Three beers were selected containing different levels of the hop-derived bittering agents. Students sonicated the beer to expel carbon dioxide, performed a liquid-liquid extraction of the hop acids with iso-octane, and measured the UV and visible absorption spectrum for their sample. We used the visible absorption spectra to help classify the style of beer. The UV absorption was used to quantify the concentration of hop acids and thus the bitterness of the beer (measured in IBUs).

Chemistry students of all levels were able to learn advanced analytical methods used in the beverage industry to analyze beer bitterness. General and organic chemistry lab techniques were utilized including UV-Vis spectroscopy, usage of micropipettes, and liquid-liquid extraction of organic compounds.

20181109_130346

20181109_124717

20181109_125106

The Chemistry lab portion completed, we went over to the Innovation Center for some blind taste tests. Students sampled various beers, and then used PollEverywhere to report the perceived bitterness of the sample, the results of which we compared to the lab-derived values.

20181109_141610

20181109_143051

The event was a terrific success, and students were engaged and enthusiastic. We’ve got additional interdisciplinary FermSci workshops and projects planned for this semester, including more beer chemistry, sauerkraut making, curriculum development, and a partnership with a local employer for integrating IOT technology into kombucha fermentation.

The pieces we ordered to build the volumetric display for Chemistry visualization finally arrived!  With the help of CJ, Nathan, and Rebekah (students), Max (Chemistry) got everything cabled up…

Assembly

Using bits from our original prototype, Max fired up a molecule, and it works!

Prototype, a Long Time in the Making

In order to better enjoy the three dimensional holographic molecules, we quickly cooked up a little blanket fort…

Building the Fort

Be Present

It Works!

Now that we have the parts in place, we can move on to developing the enclosure and making the system portable. It’s great to have the space, tools, and people to be able to turn good ideas into working prototypes, and we’re looking forward to making quick progress on this one (finally).

Kathleen Kirklin (FLC’s Interim President) took the robot for a spin in the library other day.

Kathleen Kirklin Drives Robot

I also had the chance to share with Kathleen and Gary Hartely (Dean) progress on the aquaponics project. The plan is to have the screen display some rolling information about the biological and chemical processes in play, interspersed with footage from the live fishcam that will be inside the tank. Pressing the big green arcade button will bring up charts and graphs of the in-tank (temp, pH, electroconductivity) and out-of-tank (temp, humidity, and perhaps one or two others) sensor data.

Robot Observation

Lots to do, but within the next couple of weeks there should be some serious development work on all parts of the project…

Photos courtesy of Tony Humphreys.

Working on a new prototype, combining the models from 3D Printed Potential and Free Energy Surfaces for Teaching Fundamental Concepts in Physical Chemistry (Kaliakin, Zaari, and Varganov) and something like this:

Max Mahoney (Chemistry) printed one of the models from the aforementioned paper, and we got to discussing how we might fill it with sand and inject some energy in the system to motivate the sand to shift around to demonstrate concepts of chemical reaction kinetics and dynamics.

Untitled

I found a Sonic Ghost VX-GH72 Electro-Mechanical Audio Transducer in the workshop. I purchased it some years ago hoping to replicate a sweet project I once saw at Maker Faire, developed by Sasha Leitman and involving 50 gallon metal drums with contact mics attached, with the drums acting as…well…drums, but also acting as speakers.  Anyhow, we hooked the transducer up to a piece of metal and threw some sand from the aquaponics project on there, and played around with different frequencies.

Untitled

We ended up breaking the transducer, and substituting a speaker, upon which we place the metal sign, with the model taped to the top.

Untitled

We were able to get the sand to bounce out of the lowest spot and into one of the higher ones, so the rough prototype is showing promise…

Sean Fannon (Psychology) and I secured a small grant to get our hands on an OpenBCI, which is an open source brain-computer interface, complete with a headset that can be printed on a 3D printer.  Sean plans to use the device to enable students to do some fairly sophisticated brain research.  Fortunately, the new Ultimaker 2+ Extended has a sufficiently large build envelope, so I set it up to print half of the headset overnight, and watched it on YouTube in an obsessive way using the Open Broadcaster setup.

Printing OpenBCI Mark III

Came in this morning, and it all seems to have printed well. In what is a first, I think I might not have enough PLA on the spool to finish the job.  Unfortunately, the Ultimaker uses the fat stuff (2.85 mm), and the Printrbot uses 1.75 mm, which I’ve got a lot of. I read somewhere that the Ultimaker can be tweaked to run the smaller filament, so I might just have to give that a shot.  Some of the smaller bits I plan to use to test the Form 2 that should arrive some time in early July.

OpenBCI Ultracortex Mark III

Working with Max Mahoney (Chemistry) on a molecule visualizer, and we had the opportunity to throw the prototype on a 30″ monitor. The results are encouraging!

30" Monitor-scale Volumetric Projection Prototype

30" Monitor-scale Volumetric Projection Prototype

30" Monitor-scale Volumetric Projection Prototype

Next up: Max is going to render a custom molecule video.  We’ll format that for the system, and assuming all goes as planned, work out the enclosure issues, which will likely involve some CNC work.

The gear is beginning to roll in! As with any reasonably complex endeavor at any reasonably complex institution, procuring the “stuff” to make a project work takes a great deal of time and energy – lots of rules and forms and budget strings and signatures and hoops to be jumped through. For this particular project, the electronics – chiefly Arduino shields and associated sensors – are sourced from a Spanish company called Cooking Hacks.  We chose this particular system because a) the parts seem to be well integrated and seemingly well thought out, and b) Cooking Hacks seems to have the code worked out, not just for the shields and sensor interfaces, but for the server-side bits that make the web integration work.  In short, the goal is to get a prototype up and working with a minimum of coding and fuss, and the Cooking Hacks gear seems to fit the bill.

Making Across the Curriculum - Aquaponics Project Hardware

I was able to get most of the sensors working in relatively short order, so I’m feeling good about the progress.  Still waiting on the purchase order for the tank itself, and the ECO-Cycle Aquaponics Kit for the top, but we were able to get a small test tank up and running, thanks to some spare parts the Biology Department was able to scrounge, and some help from Max Mahoney (Chemistry).

Making Across the Curriculum - Aquaponics Project Test Tank

In addition to the little aquaponics setup above, we gathered up another unused 23-gallon tank, complete with filtration and gravel and all the parts necessary to bring up a complete “development instance” of the project in the Innovation Center, which we’ll use to test the electronics, and to get the water and filtration and fish and procedures sorted out.  Progress!

Professor Jennifer Kraemer (Early Childhood Education) and I recently collaborated on a lesson plan to use 3D printing in the ECE classroom.  Specifically, the project uses the Free Universal Construction Kit, a set of printable interfaces that bridge 10 common proprietary building systems including Lego, Lincoln Logs, Tinkertoys and K’NEX.

Untitled

The full lesson plan can be found here:  https://docs.google.com/document/d/1GVfIXhJFxgTq3lA5-n3uwT9XyLTdKMayLcqPaE36VCc/edit?usp=sharing

We hope to test it out in ECE 342 – Constructive Math and Science in Early Childhood Education.