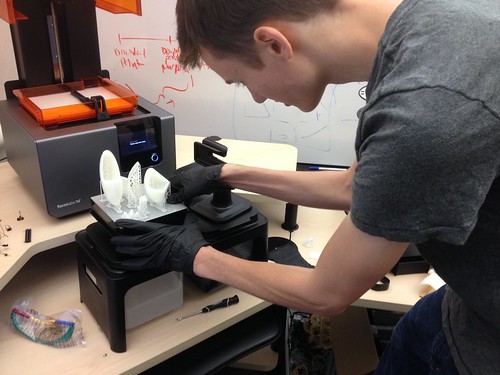
Unsurprisingly, there’s been a lot of making in the makerspace lately. For instance, Sydney (student and Makerspace Facilitator) is working on this magnificent costume helmet.

Rad Helmet

It lights up. N’omi (student) has been manufacturing these custom cutting boards…

Industrious

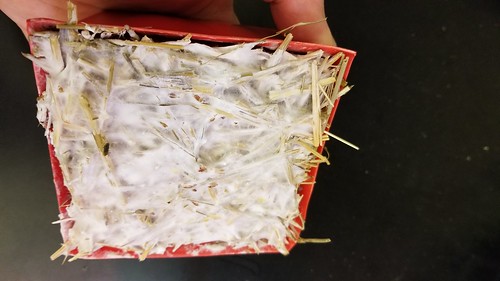
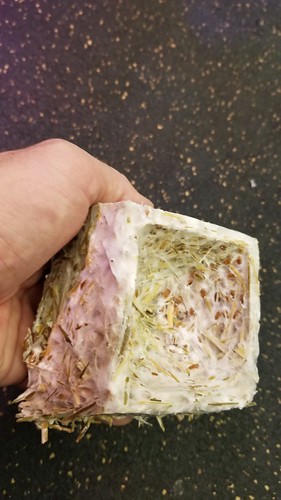
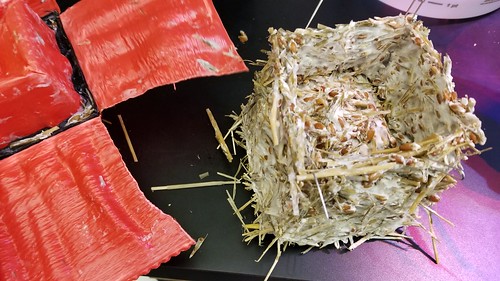
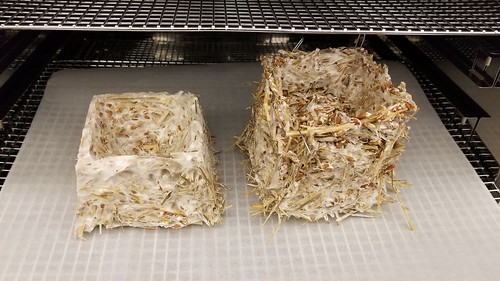
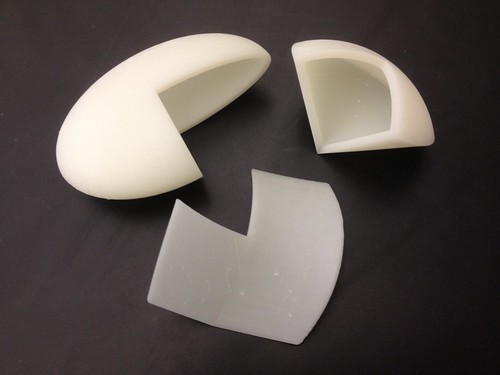
…and we freed the mycelium chimp face from it’s mold…

Mycelium Chimp

Meanwhile Sophie (student and Makerspace Facilitator) has been designing and producing these custom patterned rolling pins.

Rolling Pin

Meanwhile, Nicole (student and Makerspace Facilitator) has been directing the efforts of a skillful group of student interns as they continue with a large-scale, interactive periodic table that will be mounted in on of the large lecture halls on campus.

Periodic Crew

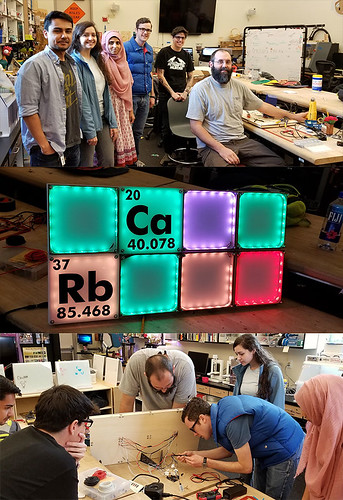
The lit up the latest prototype yesterday – it’s controlled by an Android app – and if this latest prototype is any indication, this project is going to be amazing!

Today we got a look at the first prototypes of our mycelium-based 4″ planting pot project. Here’s how they looked, still in the forms.

20190221_103744

The “good” one – the one where the 3D printed PLA positive didn’t deform during the vacuum forming process – is really solid and feels done.

20190221_103819

The second one didn’t want to release from the form, which was not surprising, given how much deformation occurred during thermoformer’s heating cycle, so I had to cut it free from the pot, and use few paper clips to keep the top section attached to the more substantial base.

20190221_105257

Into the dehydrator at 100 degrees Fahrenheit for about three hours, and we’ll see how they feel after that.

20190221_105459

For this iteration, we used oat hay as the substrate, into which we mixed rye berries inoculated with King Oyster mushroom spawn. Since we set up v1, we’ve received a food processor, in order that we might more finely chop up the substrate, and we also have some other substrates in the shop, including rice hulls and various wood chips. V2 next!

A member of the community contacted me recently about the possibility of helping to repair a broken clock gear. We’ve got an Omax ProtoMAX in the shop, and this seemed like the perfect opportunity to use it for a compelling project. Steve sent me a photo of the broken piece, and I pointed him in the direction of geargenerator.com, a free online tool created by @AbelVincze that enables the creation of sophisticated gears, and will allow you to export your creations in DXF format.

Gear Generator

Steve did a lot of good work design work, and we traded files back and forth until I felt we were ready to cut a few prototypes for fit.

Gear Comparison

We spent some time in the lab measuring the gear and tweaking the file, adding the two auxiliary holes and the cutouts for the index tabs by hand in Illustrator…

2019-02-12_01-29-56

…after which we cut a couple of prototypes, first in wood to A/B with the original, and then in acrylic, which Steve took home to check for fit.

2019-02-12_01-30-27

The final acrylic prototype fit so well, in fact, that part of the brittle acrylic broke when Steve tried removing it. Success!

Gear Before

Steve then sourced some brass plate, and we were now ready to engage Hayes (student, makerspace employee, and ProtoMAX expert) to prepare the file for use with the waterjet to cut the final version. Steve and Hayes were able to cut a very close likeness of the original broken gear.

Match!

Steve took it home, installed it, and reports that the clock is working perfectly!

Gear After

Victoire (Communication and Media Studies) dropped by the lab today, and shared an idea she had about creating a puzzle as part of her Group Communications class in the fall. She brought with her a piece of paper with the “Everybody, Somebody, Anybody, and Nobody” story on it, and talked about turning it into a puzzle. We quickly got to prototyping, first on paper, kicking around ideas about the sizes of the words, the individual pieces, and the puzzle overall. We fired up Illustrator to create version 1, which we laser cut on 1/8″ hobby plywood.

Victoire Designs

We immediately agreed that the pieces were too small, the words not legible enough. Back to the drawing board, where we more or less quadrupled the size of the pieces, and changed the letters from vector outlines to raster engraves.

20180809_154858

This version felt more or less right, and then I remembered a project Jeremy (Making Social Change student) had done maybe a year ago, spray painting plywood and then laser engraving that for a white-on-black effect. We happened to have a piece of prepared plywood, which turned out to be the best of the bunch.

Puzzling

After test driving the puzzle, Victoire was satisfied with how it felt, and she was able to set up the laser job and produce enough puzzles to take with her for the first day of class in a couple of weeks.

20180809_161535

Victoire walked in with an idea, and walked out with a v1 prototype about an hour and a half later, feeling super charged up and empowered. Priceless.

Diane Carlson (Sociology professor, and co-creator of Making Social Change) and I finally got around to building out version 2.0 of the Wheel of Voter Fortune Diane created as part of the Making Across the Curriculum faculty professional development academy from summer of 2016.  Diane uses the wheel with her students to help them develop an understanding of voter suppression.  Building upon Diane’s original prototype, we added a mask so that only one segment of the wheel would be revealed.

How Many Bubbles?

We also created a control panel to hold a switch and batteries…

Wheel of Voter Fortune control plate

…and used a piece of copper wire and an LED to create a flexible lamp.

Wheel of Voter Fortune v2

Ideas for version 3 include interchangeable question wheels, and maybe some elaborate game show lights and sounds!

I’ve been working off and on for months on a furniture project, a set of cabinet door panels inspired by the Japanese woodworking art of kumiko. Today I was finally able to laser cut a full-scale prototype of the project.

Kumiko Laser Panel

Here’s a look at the Illustrator file, a painstakingly assembled collection of hexagons, based on three archetypes:

Kumiko Screenshot

Here’s what was left in the laser:

Kumiko Negative

I couldn’t be happier with the result, and it’s particularly thrilling to hold in my hand something that has lived for so long inside my head and on a computer screen.

Update – Amazing when backlit!

Below is Alex Hartigan, a Folsom Lake College Engineering student preparing some Calculus III models he’s been developing in collaboration with Kevin Pipkin (Math) and that he printed on the new Form 2, which has gotten a lot of use lately, most recently with the Enabling the Future project.

Untitled

Alex and I connected last semester, and finally got the chance to work together on this Math project. Alex has a lot of skills in 3D design and printing, as well as experience on the Form 1, and through the process of preparing the Calc models, he taught me a whole lot about the finer points of printing on the Form 2, including various layout tips, and the manual editing of supports.

The Form 2 models came out great:

Untitled

The Ultimaker 2 ones, not so much, though the failure at least resulted in some interesting artifacts:

Untitled

Best of all, Max Mahoney (Chemistry) dropped by, and we recruited Alex to work on the chemistry project we prototyped the other day. One of my favorite parts of working with students is learning from them, and I hope to learn a lot from Alex before he heads off to Sac State next fall.

Untitled