A couple of days ago, in the midst of the x-carve build, a new vinyl cutter arrived.

Vinyl Cutter

I had seen a lab full of them at a recent visit to Portland Community College’s MakerSpace, and Gregg Meyer (coordinator of the space and all-around enthusiastic and generous person) mentioned that they were an inexpensive and useful bit of gear, and quite accessible to makers at all skill levels.

Cameo Vinyl Cutter

We needed a project to put the new machine through its paces, so we decided to label the experimental aquaponics system. The software that comes with the machine is pretty straightforward, and we were able to design and cut out some signage relatively quickly.  After cutting out the letters, we realized we didn’t have any transfer paper, so we made do with blue painter’s tape.

Preparing the Science Fish Sign

The transfer went off without a hitch!

Science Fish!

Max Mahoney (Chemistry) and I met today to do some preliminary sensor calibration for the aquaponics system.  Max brought over various solutions of known pH and µS/cm.

Solutions of known pH for aquaponics sensor calibration

We connected the pH sensor to the Cooking Hacks Open Aquarium shield, and went through the procedure of calibrating the sensor, which involved basically sticking the sensor into a beaker of various solutions, recording the values, and tweaking some variables in the Arduino sketch.

pH calibration for aquaponics sensor

The process for the electroconductivity sensor was much the same. Both worked without a hitch, and once the calibration procedure was complete, we tested the water from the experimental system – 7.54 ph/298.24 µS/cm – and from the quarantine tank – 7.07 pH/176.83 µS/cm. There’s something up with the temperature sensor, which gives a zero value no matter what, so we’ll need to get that sorted, but overall a very successful work day. To top it of, the power and Ethernet should be installed out in the library tomorrow!

Max calibrating pH sensor for the aquaponics build

Still waiting for the power and some other critical infrastructure pieces for the library aquaponics system to line up, so I’ve been working here and there on an open source, 3D printed drip system that uses recycled soda bottles as plant containers.

I was never quite able to get the venturi – the piece that uses air from an aquarium air pump to push water up a tube to water the plants – to work properly. It would work for a few hours, and then quit, I think because of clogs in the tiny air courses, so I set out to explore other solutions. Working off of an idea I found on Instructables for a bubble lift hydroponics setup, I headed to the hardware store for a few items, and was able to cobble something together.  Science!

Aquaponics Drip System - DIY Venturi

It’s been running all day, and seems stable. I’ll let it run overnight just to be sure, but I felt confident enough to stick some mint cuttings into the bottles, and hope they’ll root.

Aquaponics Drip System, Dripping

The venturi in the tower aquaponics system doesn’t seem to work reliably.  I’m guessing that the inner pathway keeps getting blocked, either by artifacts of the printing process, or with gunk pulled in from the water.  In any case, I’m going to try a different approach.  Specifically, I’m going to put a small pump in the tank, and have that on a timer, periodically flooding the bottles.  To do that, I need to connect tubing of various diameters.  I poked around on Thingiverse and found this hose barb adapter and manifold (CC BY-SA, by papergeek).

Aquaponics - Hose Barb

A few tweaks in the Customizer, and I’m able to print essentially any barb I need.  Using a 3d printer to print objects to demonstrate 3d printing is one thing, and using a 3d printer to print useful objects for immediate use in a project is something altogether different – something like a miracle.

While waiting for the various parts and processes to resolve for the aquaponics project, I’ve been experimenting with 3Dponics, and open source system/community for 3D printed aquaponics parts.  To set the system up, I cut and punched holes in plastic water bottles, then printed screw-on drip nozzles (CC BY-SA, 3Dponics), and an aquarium air pump driven venturi to provide water for the system.  With the venturi in the experimental system/quarantine tank, I turned on the pump, and the whole thing seems to work perfectly!

Untitled

I’m going to let it run for a few days to make sure things are good to go, and then I’ll fill the bottles with plants.  My current thinking is to root mint cuttings.  Mint is perfectly happy in wet and low-light situations, and roots readily from cuttings.

The project is slowly coming together. Yesterday, the ECO-Cycle Aquaponics Kit arrived!

Aquaponics Infrastructure

We’re taking some shortcuts with phase 1 of this project, combining kits where available, in an effort to shorten some of the development time and get to a public roll-out sooner.  Now that we have the actual setup, we can proceed with the final design phases of the tank base, which will include some variation on the nitrogen cycle diagram.  Max Mahoney (Chemistry) has the pH test solutions ready, so hopefully next week we can get the sensor array working.  In other news, I heard from IT, and they’re coordinating with the electricians to complete the network drop when the Library floor is opened up for the electrical work.  Slowly but surely…

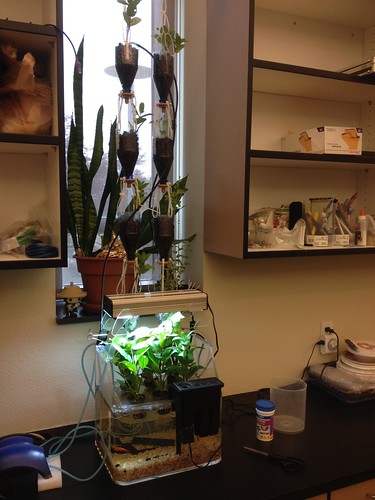
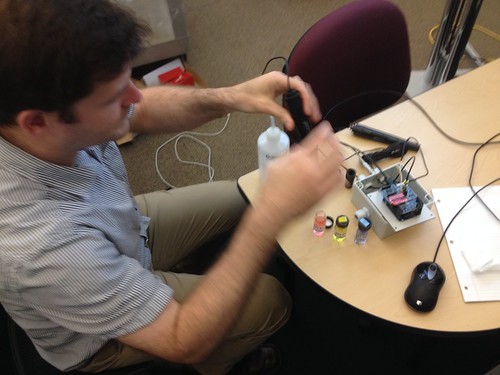
Made some spectacular progress on the aquaponics project, producing a prototype of what will eventually be the light-up infographic built into the base. The team collaborated on a design for a diagram of the nitrogen cycle, and with the help of Ian Wallace (Professor, Theater Arts) and Cameron Hoyt (student and designer of the tank stand), we were able to get the design cut out on the big ShopBot in the scene shop.

Tools have their own logic, and CNC is no different. Balancing legibility of the design with the properties of the materials and the constraints of router bit size was a learning experience. The initial design was text heavy, but the 1/8″ bit introduces some size constraints. That is, the text has to be large enough for the machine to cut. After consulting with Ian, I scaled up many of the lines, adjusted the font, and created a little 1/8″ dot to drag around the image as a simulated router bit.  The original is on the left, with the revised version on the right (below).

Aquaponics Project: Nitrogen Diagram Before and After

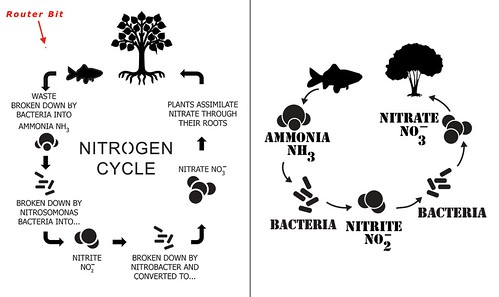
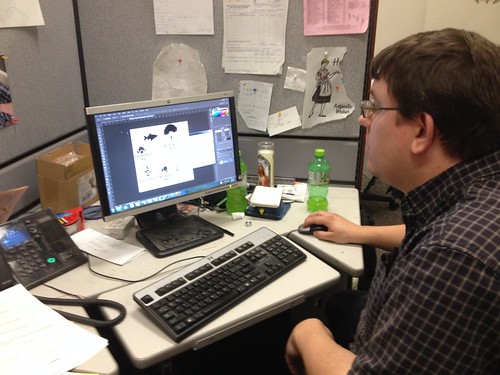
Ian took the draft diagram and ran it through software to create the tool path. Some scale work still to be done, especially on the text, but we decided to run a test cut anyhow.

Aquaponics Project: Ian Checking the Nitrogen Cycle Diagram

I watched and learned as Cameron and Ian set up the ShopBot and got things ready to carve…

Aquaponics Project: Ian and Cameron Helping to Set up the CNC Job

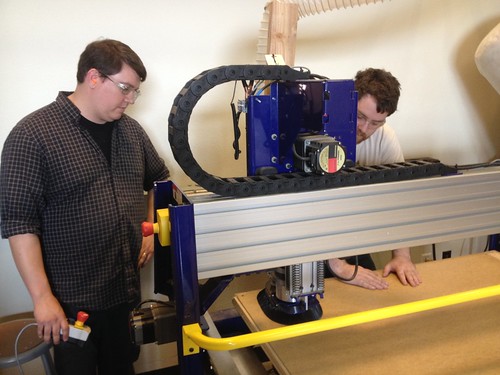
…after which I babysat the machine, which took about 30 minutes to cut out the prototype.

Aquaponics Project: Nitrogen Cycle CNC

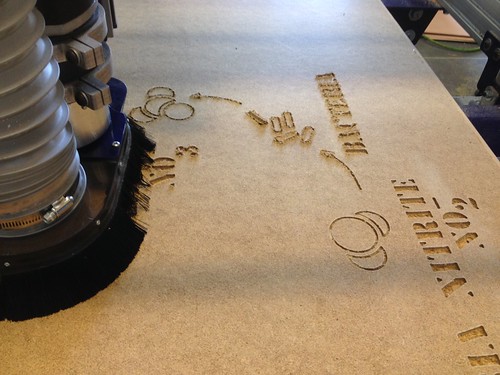
Below is the prototype, after a little cleanup with a knife, sandpaper and a file.

Aquapics Project: Nitrogen Cycle CNC Prototype

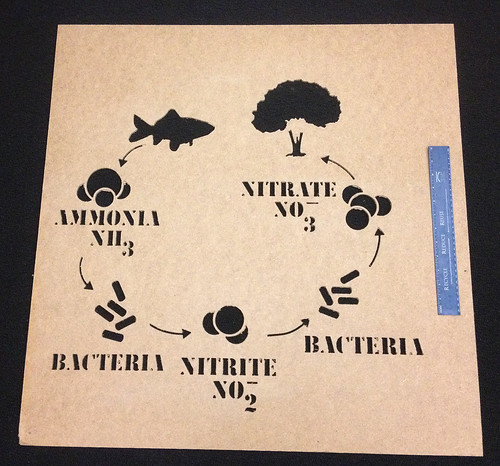
There’s still some design work to be done, and some tightening and scaling to make the diagram legible, but we were very pleased with this rough version. Always be prototyping!

The gear is beginning to roll in! As with any reasonably complex endeavor at any reasonably complex institution, procuring the “stuff” to make a project work takes a great deal of time and energy – lots of rules and forms and budget strings and signatures and hoops to be jumped through. For this particular project, the electronics – chiefly Arduino shields and associated sensors – are sourced from a Spanish company called Cooking Hacks.  We chose this particular system because a) the parts seem to be well integrated and seemingly well thought out, and b) Cooking Hacks seems to have the code worked out, not just for the shields and sensor interfaces, but for the server-side bits that make the web integration work.  In short, the goal is to get a prototype up and working with a minimum of coding and fuss, and the Cooking Hacks gear seems to fit the bill.

Making Across the Curriculum - Aquaponics Project Hardware

I was able to get most of the sensors working in relatively short order, so I’m feeling good about the progress.  Still waiting on the purchase order for the tank itself, and the ECO-Cycle Aquaponics Kit for the top, but we were able to get a small test tank up and running, thanks to some spare parts the Biology Department was able to scrounge, and some help from Max Mahoney (Chemistry).

Making Across the Curriculum - Aquaponics Project Test Tank

In addition to the little aquaponics setup above, we gathered up another unused 23-gallon tank, complete with filtration and gravel and all the parts necessary to bring up a complete “development instance” of the project in the Innovation Center, which we’ll use to test the electronics, and to get the water and filtration and fish and procedures sorted out.  Progress!

Met with Cameron Hoyt (FLC Theater Arts student and primary design and construction resource for the project) to go over some initial design drawings.  We talked through a bunch of considerations regarding size, scale, construction, safety, design, integration with the space, ease of access, cable routing, and other things.  I’ll be seeking input from the other project primaries – Biology, Chemistry, and Library faculty – as we further refine the project and enter the build phase.

Making Across the Curriculum - Aquaponics Design Drawing 01

Making Across the Curriculum - Aquaponics Design Drawing 02

Full set of drawings