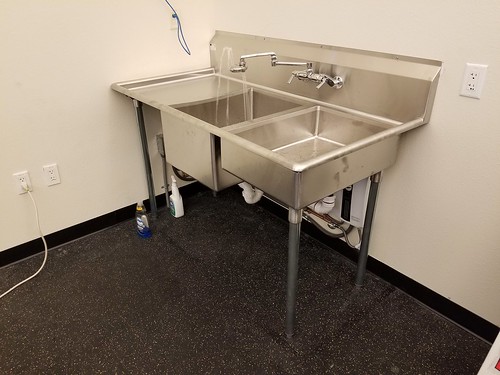
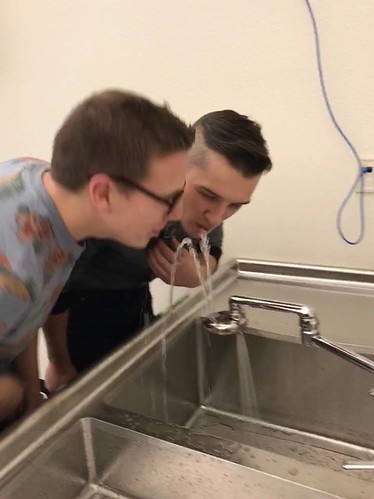
This is Tom, and he recently finished installing our magnificent sink.
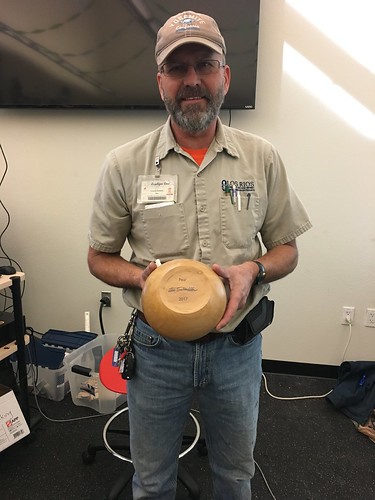
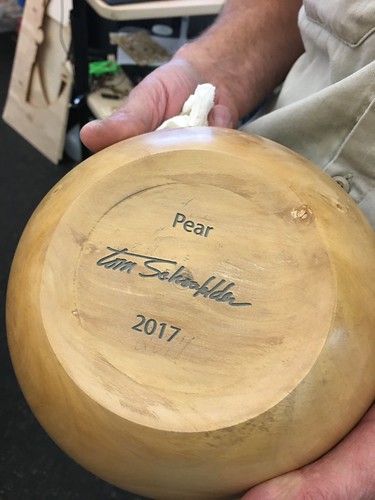
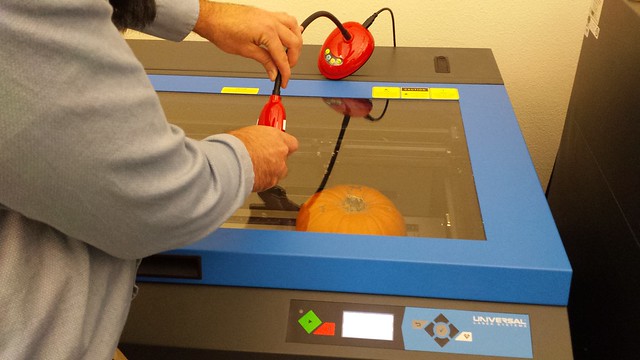
Tom is a wood turner, and after spending some time in the space and seeing the capabilities of the laser, thought he might like to try to engrave some of his work. He brought in a pear bowl he had recently turned, and Rebekah (student and Innovation Center student employee) and I figured out how to use the auto-focus feature of the laser – we don’t use this much, and perhaps the only other time it’s come into play was when we tattooed a pumpkin back in October – to successfully engrave his signature on the bottom of said bowl.
The sink, by the way, has a built in eye wash, something that we we’re happy to have for safety reasons…
Students Andrew Canafe, Tristan Chutka, and David Taylor created the project for their Physics 421 course, and used the Innovation Center’s laser cutter to produce the final parts. Here’s a video of its majesty. Note the safety key and prominent warning sticker. Try this at home, kids, but do it safely!
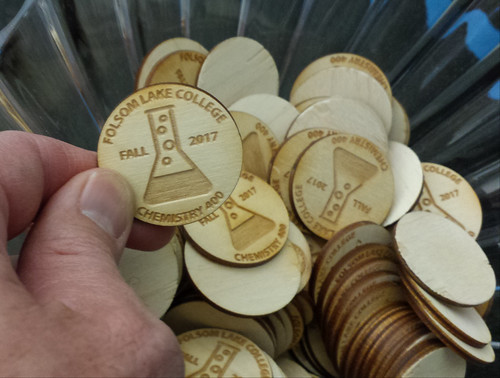
Dominic Green (Chemistry) and I collaborated on these General Chemistry extra credit coins, and used the laser cutter to etch and cut them. Dominic will distribute them to students who earn extra credit in class, and then collect and tally them at the end of the semester.
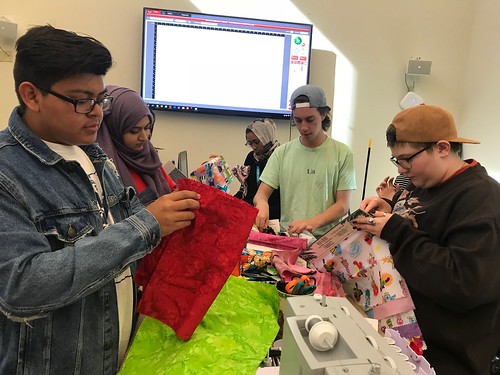
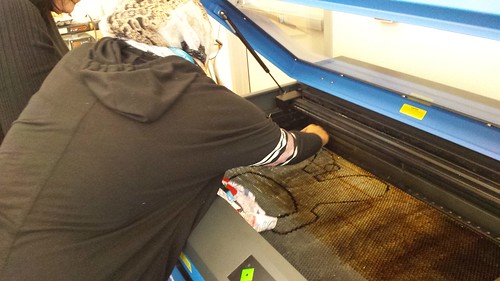
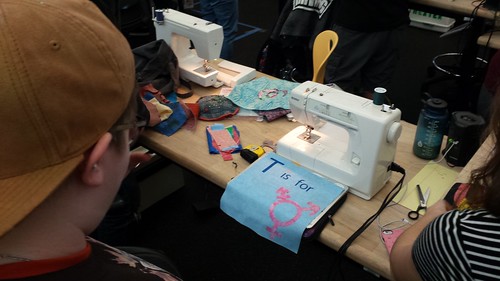
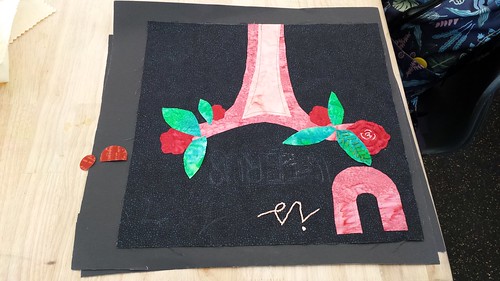
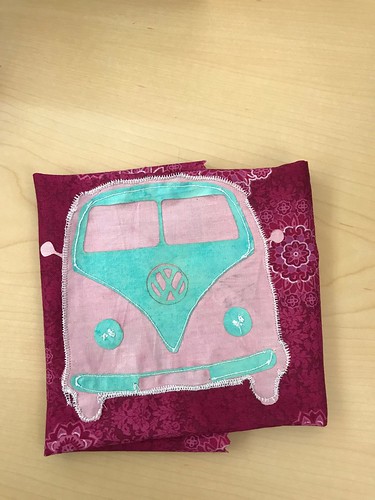
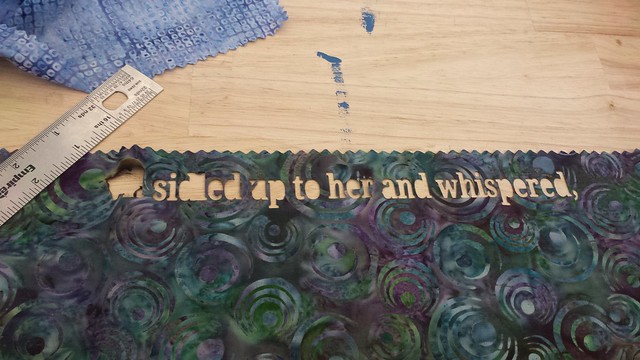
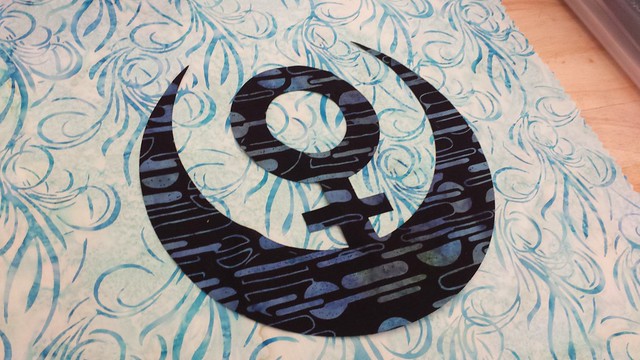
Inspired by our class visit to the Rocklin Mini Maker Faire, where the bulk of our time was spent in the open sewing lab, we spent a recent session of Making Social Change creating applique quilt squares for a collective class quilt. The Theater Arts Department loaned us seven machines to add to the one we have in the Innovation Center, and were able to borrow a few others from students and faculty so that each student would have one to work with. Students started by selecting fabric from a beautiful trove of fabric samples (generously provided by our faculty researcher Jill Bradshaw) and used the laser cutter to cut out 12″ background pieces.
We set up two ironing stations so that students could apply Mistyfuse backing, after which they cut applique shapes and words using the laser cutter (and sometimes good old fashioned scissors).
We had a few folks with sewing experience, and some with none, but students helped each other, and Diane was around to provide guidance and pointers.
Overall a very empowering and dynamic class session! Here’s a gallery of Diane Carlson’s (Sociology) photos from the day:
The hardware store was blowing out these Halloween ghost-projecting LED lights for $5, so I picked up a couple, with the intent of modding them to project images of our own choosing. After some initial hassle getting the nonstandard screws out of the housing, we were able to pull the whole thing apart, after which CJ (student) laser cut a new projection mask featuring Nova, our mascot. Behold!
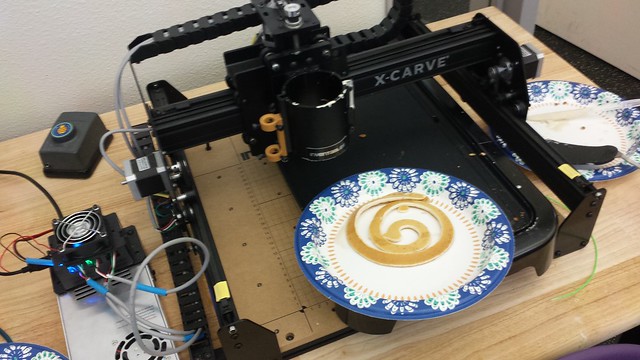
On Halloween this year, we hosted a potluck in the Innovation Center. Music, pumpkin carving, and a couple of experiments, including turning the X-Carve into a pancake machine. We went with a low tech approach, simply replacing the router with a squeeze bottle and relying on thin batter and gravity to keep things flowing.
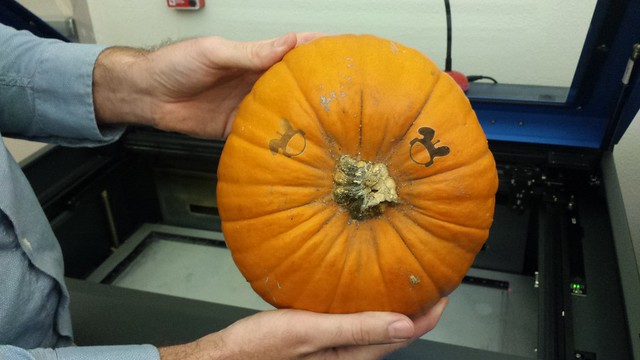
We also laser etched Nova (our space bunny mascot) onto a pumpkin, which turned out surprisingly well!
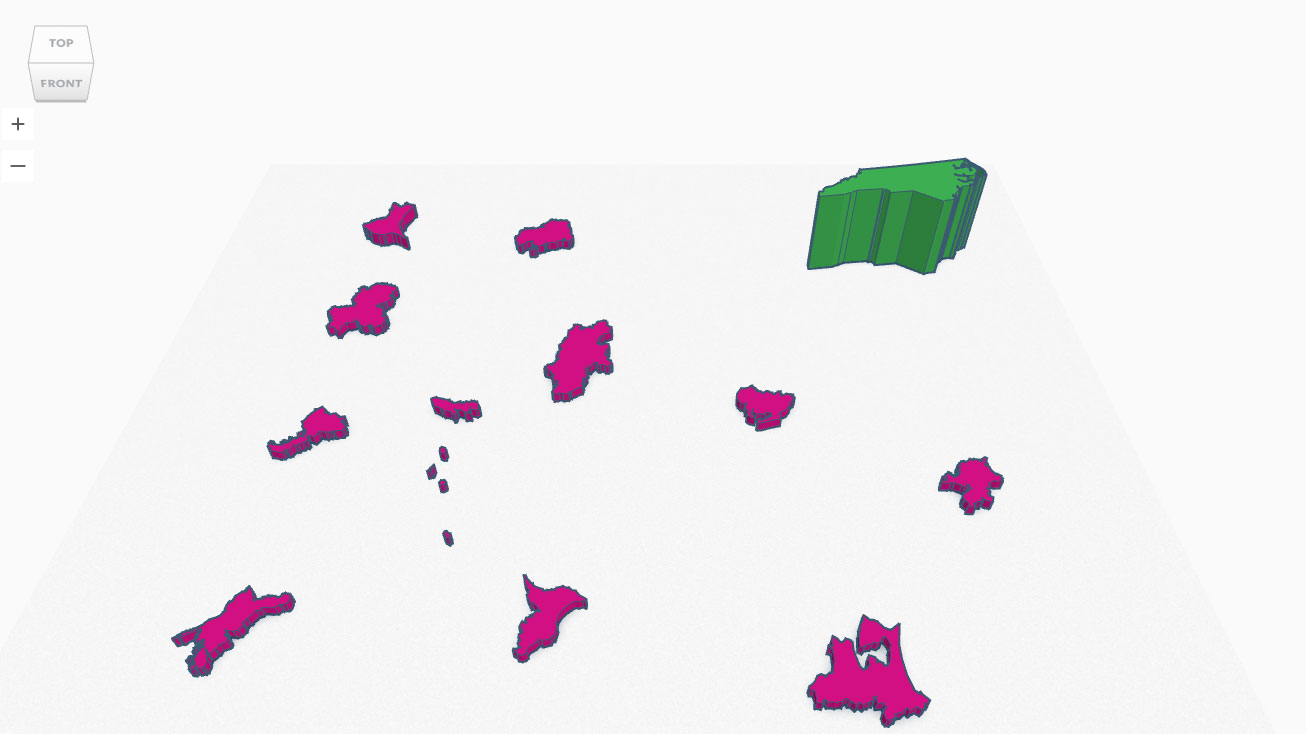
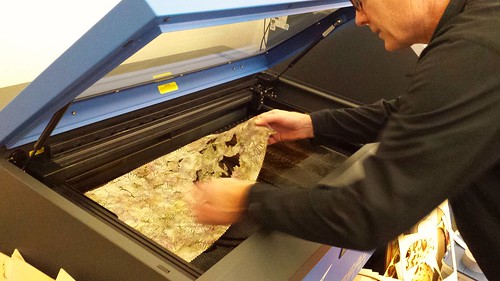
At the Rocklin Mini Maker Faire this past weekend, I spent a lot of time in the sewing lab, and was able to gain some confidence in working through the sewing process. Diane Carlson (Sociology) and I have been working to develop a collaborative quilting activity for our Making Social Change class, and one thing we’re really interested in is using the laser cutter to cut fabric. As it happens, I had an appointment yesterday morning with Mark Boguski (Ceramics and Ceramic Sculpture, Sacramento City College). Mark works in clay, and whenever he’s in the lab we end up brainstorming different ways to combine technology and other production processes traditionally associated with the studio arts; for instance, our recent experiment with multi-part stencils. I was sharing with Mark my interest in using the laser to cut fabric, and showing him Tinkercad, and in particular its *.svg export functionality. In the process of poking around, we found a Japanese prefecture generator, and decided to use that as the basis for our experiments.
Mark set up a few prefectures, after which we exported the file, opened it in Illustrator, made the tweaks required to prepare the file for the laser, then fired up the machine:
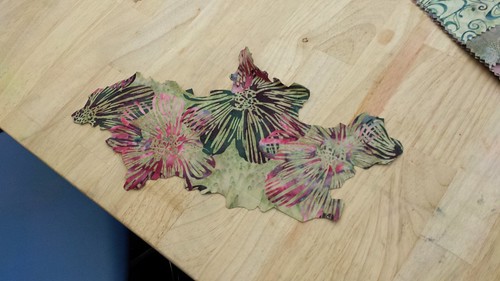
I’m not sure why, but I was surprised that it worked as flawlessly as it did. No scorching, no fuss, just crisp, clean, viciously accurate cuts.
Here’s Nagano:
Not sure what Mark plans to do with them – we talked about collage, and about dipping various things in clay slip and then firing them – but we’ll certainly cut some fabric as part of Monday’s Making Social Change class.
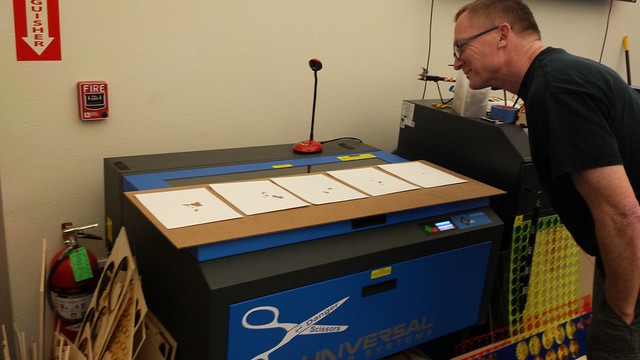
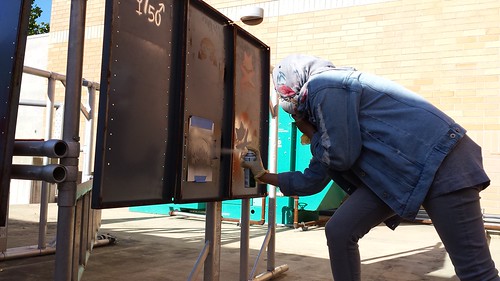
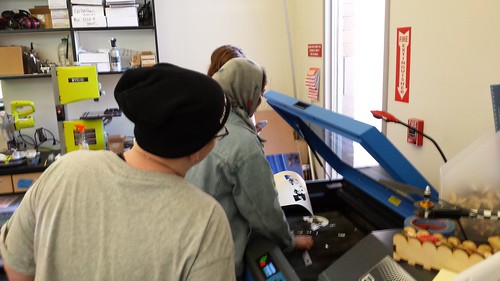
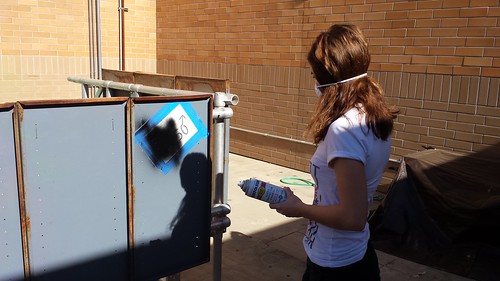
Over the years, I’ve had the opportunity to work with a few studio artists to help them incorporate digital fabrication processes into their work, and it’s always fascinating to gain some insight into how they map various concepts from “traditional” studio arts to things like laser cutting and 3D printing. This morning I had the opportunity to work with Mark Boguski (Professor of Ceramics and Ceramic Sculpture, Sacramento City College) on the laser cutter workflow. I showed Mark the gallery of stenciled images created by our Making Social Change students, and after talking about things like abstraction, legibility, resolution, and the minimum detail required to communicate a particular image, we set out to create a multi-layer stencil. Mark chose a famous image of Pete Townshend of The Who as his subject, and we used the stellar tools at stencilcreator.org to create the necessary *.svg files. I showed Mark how to prepare the files for laser cutting using Adobe Illustrator, which mostly involves setting the lines to be cut to pure red (RGB 255,0,0), and setting the strokes to .001 (which would be “hairline” in most other software programs).
Some photos from our session…
All five images cut:
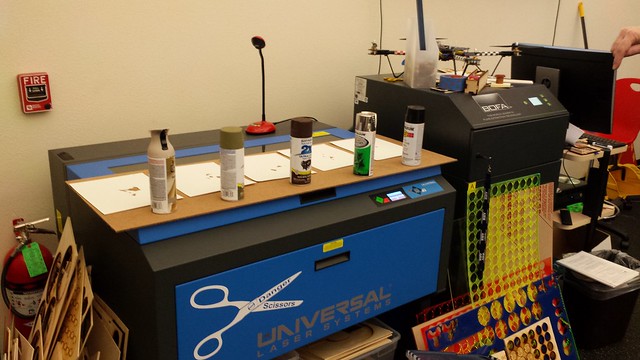
Spray paint colors chosen:
Establishing a reference point:
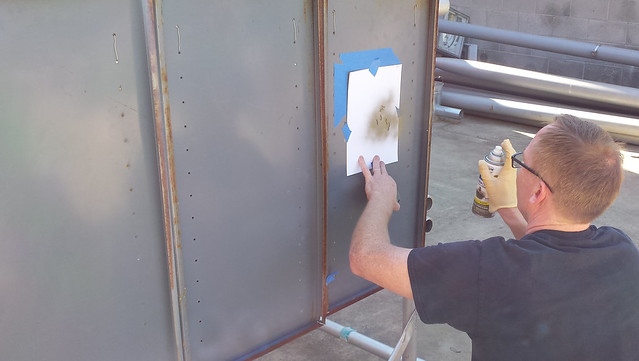
Spraying a layer:
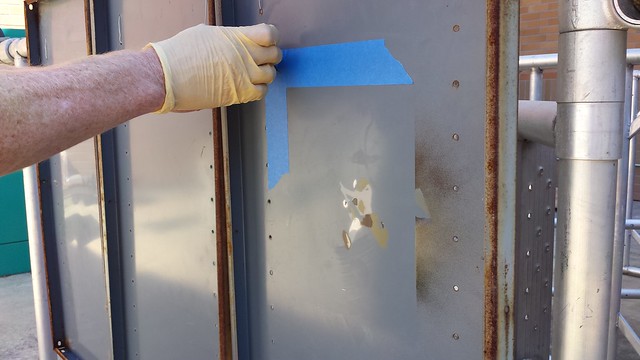
Finished image:
Animated:
Mark and I learned a lot about the process, and there are some tweaks to be made, but it’s a great v1 prototype, and I’m eager to share it with our MSC students.
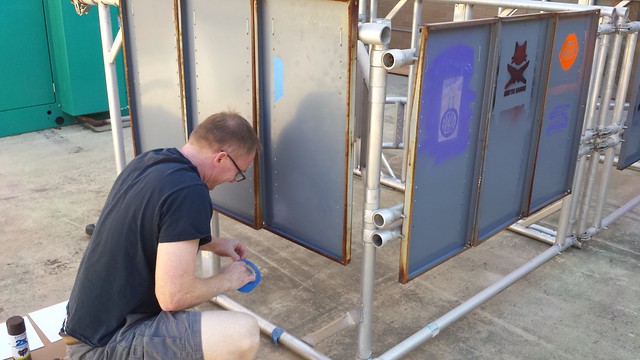
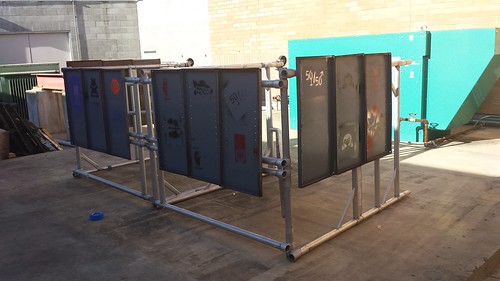
In Making Social Change today, we talked about Zapatistas and the Chiapas conflict, and the role of symbols and murals and art in political and social movements. Based on social justice issues important to them, students then created stencils using Stencil Creator and cut them out of card stock using the laser cutter. They spent the rest of the class spray painting their stencils on a makeshift gallery structure Diane Carlson (Sociology) and I created out of leftover metal shelves and an old scaffold that’s been out behind the Innovation Center for a decade or more.