Building on the initial success of casting pewter into laser cut forms, I spent some time this afternoon prototyping some coins, with the ultimate goal of creating limited edition thank you gifts for special guests and benefactors.

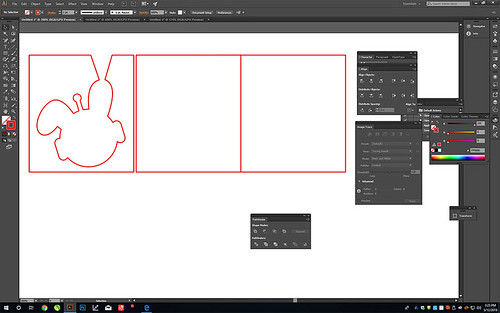
I created the file for the laser cutter using Illustrator, reversing the text on the face plates, and adding a sprue and two vents into the middle piece, which is sandwiched between the two outer squares and defines the outline of the coin.

Coin File

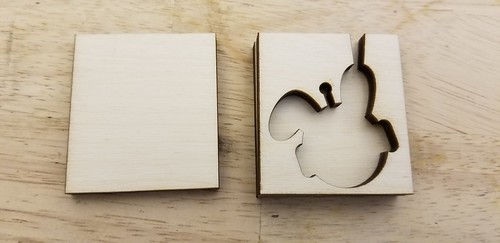
Here are the pieces, cut out of 3mm plywood….

Version 1.0

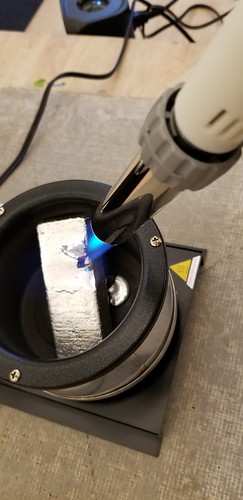
…and the first pour.

Not Bad

Not bad, but with some voids up near the ears and some loss of detail in the letters.

First Coin

I decided to melt this one down, and make some changes to the forms to try and get the metal down into the mold faster.

Melting Down

There are apparently formulas for sprue sizing, but I just decided to try making at a wee bit bigger. I also increased the size of the original vents, and added a couple more.

20190527_164747

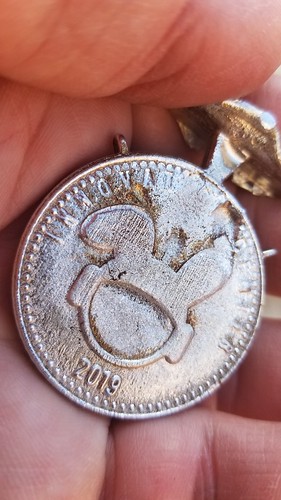
Better, but still some detail loss up near the top.

More Vents

For the next iteration, I decided to flip the outside plates upside down, the thought being that any detail loss at the bottom of the coin would be less noticeable than at the top. I also remembered to char the detail plates – a thin layer of carbon seems to function as a release agent.

Sprue on the Bottom

Success! I removed the sprues and vents using flush cutters, and performed an initial polish with fine steel wool.

Both Sides

A really good prototype in hand, I decided to try different kinds of wood for the forms. Here’s walnut.

Walnut?

Not great. Next, I found a small scrap of fine-grained wood – not sure what, exactly – but I only had enough to engrave the plates, so I used the standard birch middle piece.

20190527_174528

The metal picks up the grain of the wood, and this being a much finer grain, the result was a very shiny and smooth surface. Definitely an avenue worth exploring in future versions.

Shiny

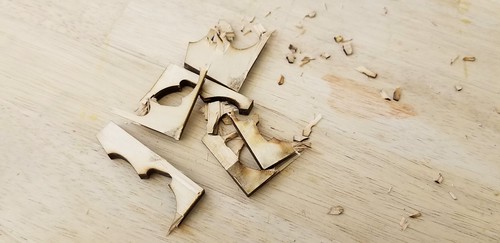
I did one more test, spraying ingot release spray on the detail plates. This caused the metal to boil and bubble, resulting in an interesting (but unusable) outcome.

20190527_180520

Really pleased with the prototype coin, and I’m excited to continue perfecting this technique, and to finding other applications for molding metal using multi-part laser cut molds.

We’ve been accumulating gear to do small scale – think jewelry – metal pours, including a little electric casting furnace ordinarily used for making bullets, a larger propane-fired casting furnace, and all the crucibles, stirring implements, ingot makers, casting ladles, and other miscellaneous items to make the process work. This afternoon, I decided to try my hand at using the laser cutter to create forms into which to pour pewter, which is relatively inexpensive and melts at low temperatures. The idea was to create a pewter version of Nova, our space bunny mascot. I prepared the outline by adding a sprue (for pouring the metal)…

Nova With Sprue

…and cutting the outline (plus pieces for the front and back) from ~1/4″ hobby plywood using the laser cutter.

20190512_122715

I read somewhere that a little carbon on the surfaces of the mold would make the metal release more easily, so I blackened the insides of the pieces that would form the outsides of mold, using a propane torch.

20190512_123358

I needed to get the pewter melting, and placed it into the casting furnace, helping it along with butane torch, which I also used during the process to heat the carbon stirring rod and ladle before using them.

20190512_123955

The metal ready, I clamped the pieces of the form together, placed the form on a firebrick, and poured the pewter, using a cast iron ladle.

I over poured some, and put a little more in when I saw a bubble pop up, but the leftovers were easily reincorporated into the pot. A couple of minutes later, and the form was cool enough to crack open.

20190512_125931

The outside pieces separated just fine, but the metal didn’t want to be freed from the wood, so I ended up breaking apart the form.

2019-05-12_03-09-21

It worked!

20190512_130738

I used a file to remove the sprue leftovers, and (after taking this picture) polished using steel wool. I like the rustic surface, and how the metal picked up the grain of the plywood. It looks very handmade.

2019-05-12_04-08-40

I was truly surprised at how simple the whole process seemed, and I have lots of ideas about using raster engraves on the front and back pieces to create detail, and about milling graphite using one of the CNC machines to create more durable forms for a series of limited edition coins we’d like to produce to give to special guests and supporters.