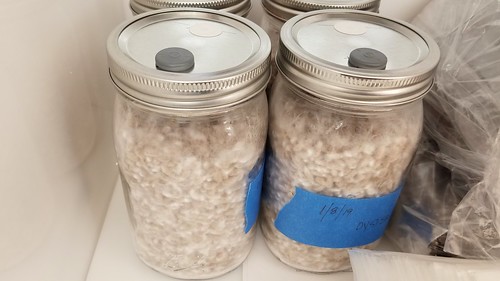
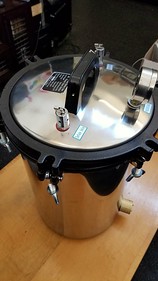
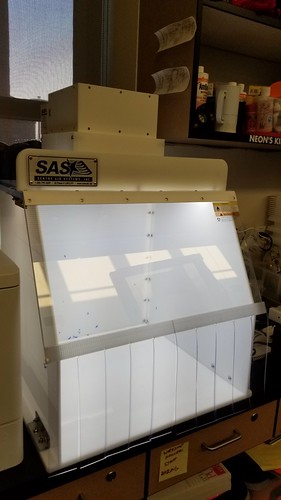
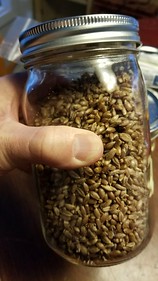
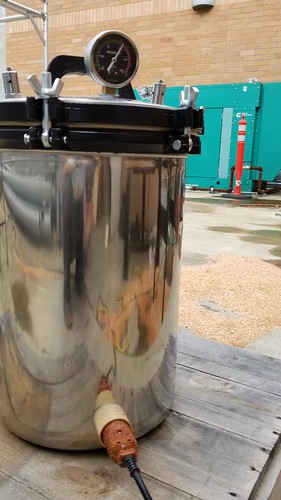
A few weeks back, Max (student and aspiring mycologist) spent some time preparing jars of rye berries for starting mushrooms, as part of our larger effort to produce planting pots for a coffee farm. We got to try out the new autoclave, which seemed to work well, though it’s noisy and a little startling. Rye berry steam smells wonderful, by the way.

Autoclave

Max returned a few days later to inoculate the jars with a few different kinds of mushrooms.

Myco Max

Myco Max

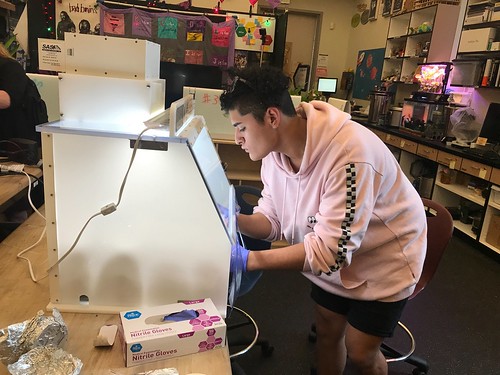
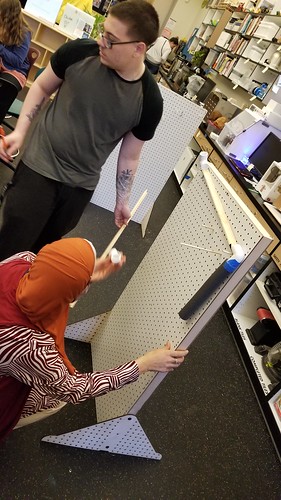
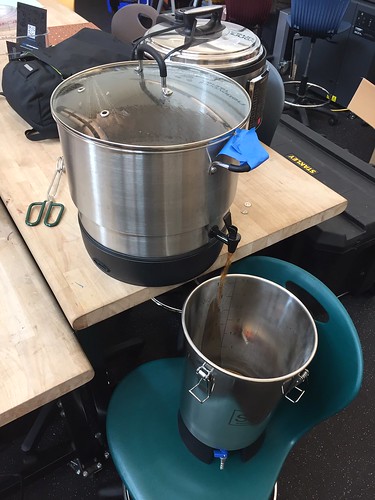
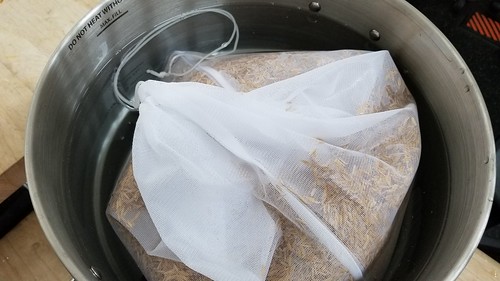
Fast forward to today. We pasteurized a quantity of rice hulls in a mesh bag in the big kettle…

Pasteurizing Rice Hulls

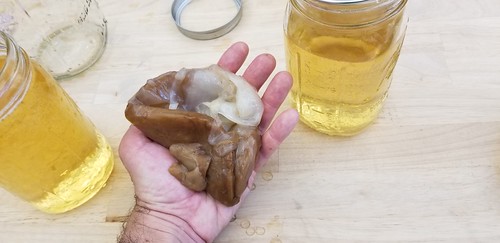
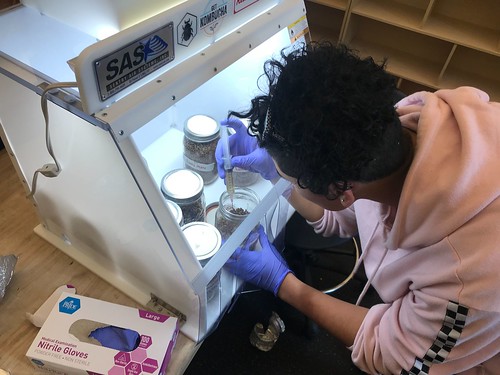
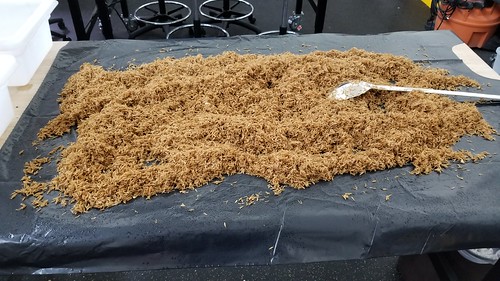
…then turned them out on a sanitized surface to cool before adding the contents of the three remaining King Oyster mushroom jars we inoculated back in February.

20190323_141743

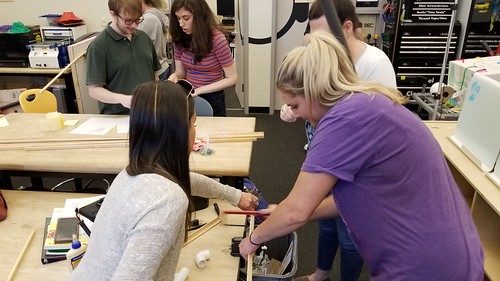
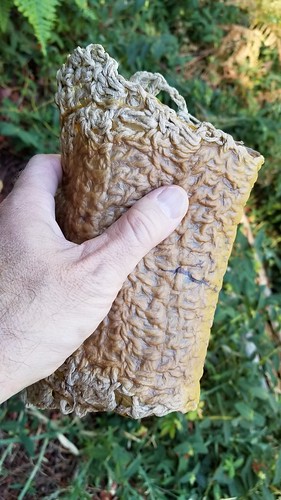
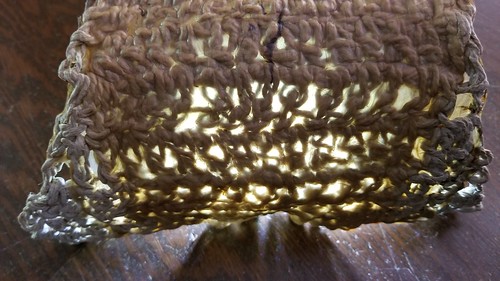
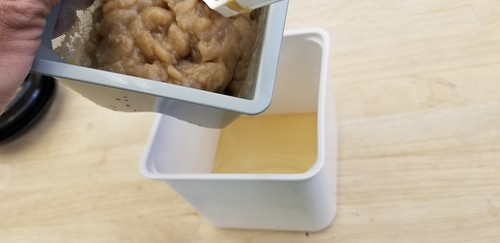
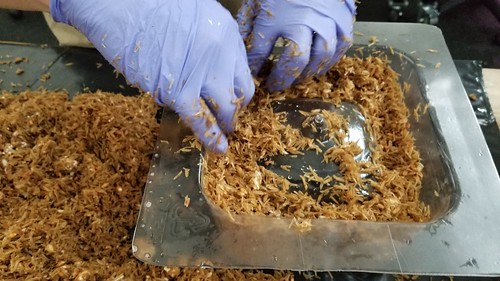
We packed the rice hulls into a form that we ordered from the good folks at Ecovative

20190323_143117

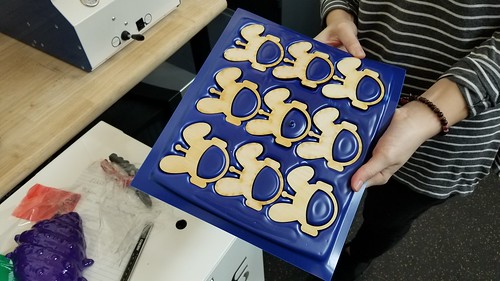
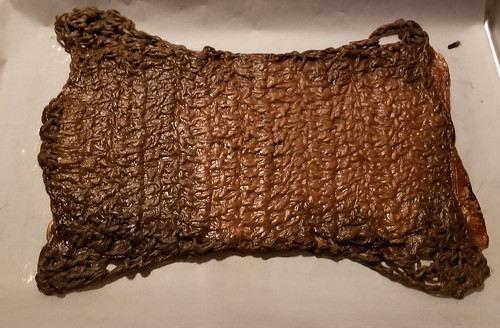
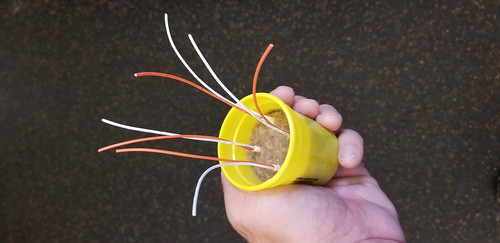
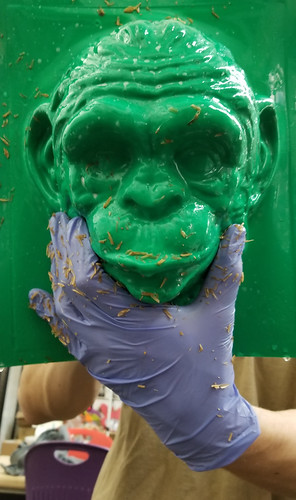
…and into sterilized four inch planting pots from the garden, and (inspired by the work of Corinne Okada Takara) still had enough to fill up the chimpanzee mask that came with the vacuum former.

20190323_143942

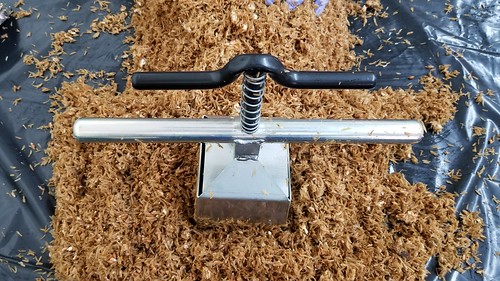
I have been kicking around the idea that we might be able to eliminate forms entirely by using a soil blocker, which is typically used to create planting pots out of soil. As it turns out, rice hulls almost but don’t quite hold together enough. I think the idea has merit, and am eager to try different substrate combinations to see if it might work, which would speed up production of finished pots considerably. One idea would be to inoculate a lot of substrate, and wait for it to begin knitting together with mycelium. Presumably at this point it would be more likely to cohere, and we could then use the soil blocker to compress it into a form. I think it’s worth a shot.

Soil Blocker

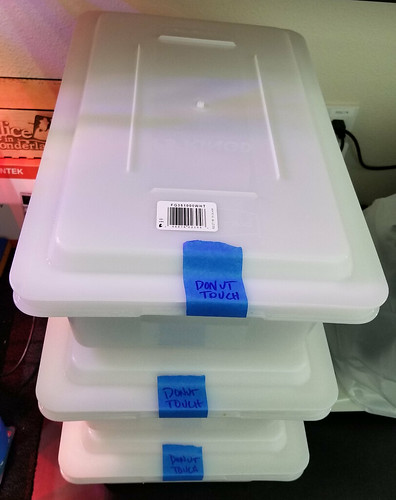
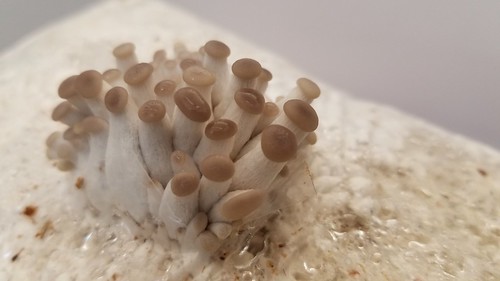
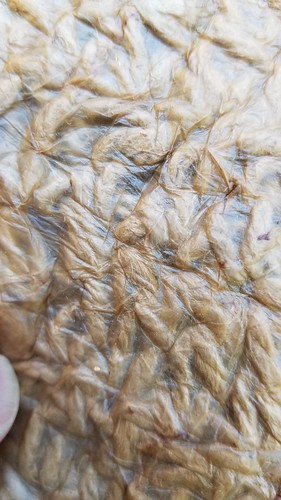
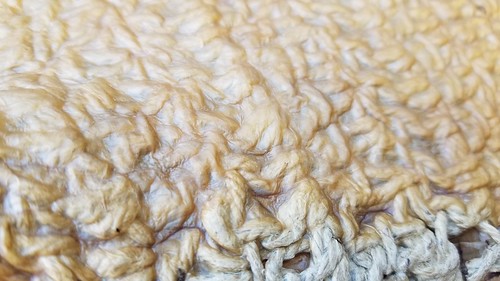
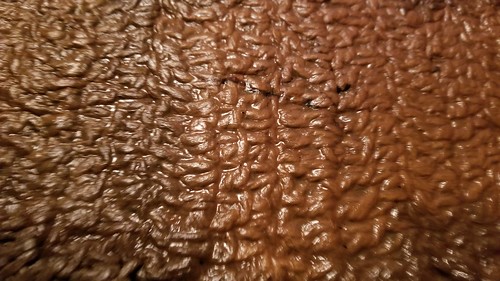
We placed all the filled forms in sterile containers, and we hope to see signs of mycelium growth in the next little bit.

Donut Touch

Inspired by the Tinkering Studio’s Instructable Make a Marble Machines Board, we set about to construct three of them for our Making for Educators class. I designed a custom foot, which we cut from 1/4″ plywood on the laser cutter in our makerspace. I put the file up on Thingiverse, in case you want to download it.

The feet include 1/4″ holes, so that dowels can be used to support marble machine elements down low.

Modified Design

We’re pretty space constrained in the Innovation Center, so we need to be able to remove the feet so as to store these marble machine boards flat when not in use. If I had it to do over again, I would have used pronged t-nuts, but we had already affixed the pegboards to the frames, so these insert nuts will do fine.

2019-03-21_04-59-01

Students spent a little bit of time in class this week working on their machines, sawing and cutting wood and foam and PVC pipe…

20190318_184314

…and beginning to attach their tracks.

Marble Run

We introduced the idea of embedding Makey Makey into their machines, and they’ll have more time to work on them in the next class session.

Max Mahoney (Chemistry) and I spent a long day brewing a couple of batches of beer recently. Now familiar with the process and how to execute it in the makerspace, we were able to add lots of variables and processes and gear, building on our experience with Brew Day v2.0, and our original, somewhat less-than-successful Brew Day v1.0.

One of the biggest changes to the process this time around had to do with the water. Specifically, we started with deinonized (DI) water, and Max added various salts to create ideal water, which as I understand it is a big factor in the overall success of the end product.

Water Chemistry

We brewed two batches of beer, and one of kombucha, which we’re fermenting in one of the smaller fermenters.

From Brewer to Fermenter

Testing the pH using one of the new meters.

pH Checking

Improvised wort chiller, until our conterflow setup arrives.

RoboBrews Assemble!

Into the fermenters.

Two Brewers, Two Fermenters

We documented things more completely throughout the process this time. Timing notes are especially important, as we’re still working out how these brew days work as labs and activities. How many simultaneous batches make sense, and how many people can effectively work in the space at the same time.

Captain's Log

Meanwhile, batch the second looks and tastes pretty good, with some distinct and pleasant apricot notes.

The Color of Brew Day the Second

We’ve got both fermenters in The Spider Shed (a former chemical storage building that we’re repurposing as a nanobrewery) hooked up to a heating and cooling system, and they’re happily bubbling away.

Brew Day the Third

We’re still learning so much, and the process is becoming even more interesting. Max is especially stoked about tweaking the water chemistry, and has lots of ideas about wrapping class activities and labs around that process. A couple more days, and we’ll cold crash these batches and keg ’em up!

Students in ECE 452 – Making for Educators spent the last couple of class sessions working in groups to create pizza box pinball machines.

Photos from Day 1:

Pizza Box Pinball - Day 1

At the beginning of our second work day, we had a visit from Sylvia Libow Martinez, one of the authors of Invent to Learn, which we chose as the text for our course. Sylvia shared some of her philosophy about making and education, and answered questions from our students.

20190225_174701

After we said goodbye to Sylvia, students got back to work.

Photos from Day 2:

Pizza Box Pinball - Day 2

In action!

With version 1.0 of their projects finished, students processed the experience, with many particularly enjoying solving the engineering challenges of the project, including the plunger and flippers. We also shared the Learning and Facilitation Frameworks developed by The Tinkering Studio at the Exploratorium, and had a good conversation about assessment within the context of making. We’ve got a great group of students for the first run of this class, and we’re excited to see what they come up with next!

Toward the end of last semester – after lengthy and vigorous and unflinching hacking of red tape – we offered the first workshop – Beer Science: Measuring Beer Bitterness – as part of our ongoing Fermentation Science efforts. We started the day in the Chemistry lab, where Max Mahoney (Chemistry professor and makerspace faculty champion) described the chemistry of beer, and led students through a procedure for measuring beer bitterness.

20181109_122745

Here’s how Max describes it:

The goal of this workshop was to expose students to a quantitative and qualitative analysis of beer bitterness. The chemistry of hops and bittering compounds was presented along with a discussion of the chemical procedures involved in this analysis. The following procedure was used to quantitatively analyze beer bitterness. Three beers were selected containing different levels of the hop-derived bittering agents. Students sonicated the beer to expel carbon dioxide, performed a liquid-liquid extraction of the hop acids with iso-octane, and measured the UV and visible absorption spectrum for their sample. We used the visible absorption spectra to help classify the style of beer. The UV absorption was used to quantify the concentration of hop acids and thus the bitterness of the beer (measured in IBUs).

Chemistry students of all levels were able to learn advanced analytical methods used in the beverage industry to analyze beer bitterness. General and organic chemistry lab techniques were utilized including UV-Vis spectroscopy, usage of micropipettes, and liquid-liquid extraction of organic compounds.

20181109_130346

20181109_124717

20181109_125106

The Chemistry lab portion completed, we went over to the Innovation Center for some blind taste tests. Students sampled various beers, and then used PollEverywhere to report the perceived bitterness of the sample, the results of which we compared to the lab-derived values.

20181109_141610

20181109_143051

The event was a terrific success, and students were engaged and enthusiastic. We’ve got additional interdisciplinary FermSci workshops and projects planned for this semester, including more beer chemistry, sauerkraut making, curriculum development, and a partnership with a local employer for integrating IOT technology into kombucha fermentation.

The new semester has started, and things seem to be happening at a furious pace.

As part of professional development days preceding the semester, we invited faculty and staff for a makerspace update, and facilitated a prototyping workshop, solving problems having to do with babies and robots.

Flex Workshop Prototyping

Our staff did some outreach to invite students to participate in our community.

Falcons_Day

Also on the community front, we participated (for the third time) in the third annual Georgetown School Family Tinker Night, an event coordinated by our sister lab at Georgetown School. We brought out a 3D bioprinter and a plotter, and the ever popular Nova (our space bunny mascot) fresnel lens family face distorters.

Nova Faces

Meanwhile, back in the lab…

The jars we inoculated with mushroom spawn earlier in the month are thriving, and we’ll be scaling that project up soon.

Mycelium!

The Science Fish have returned from the library, as we plan and implement whatever v2.0 of our aquaponics efforts will look like. Yes, those are the same three fish – Phoebe, Phinley, and Phreud – still with us after more than two years, and yes, the water cleared up quickly and it’s crystal clear now.

2019-01-26_08-38-13

As part of the CCC Maker grant, we’re able to pay interns to do makerspace-related projects, and some of them are working on a large-scale, interactive periodic table of the elements, to be installed in our large lecture hall. Here Max Mahoney (Chemistry) and Nicole (makerspace facilitator extraordinaire) review some prototypes.

20181207_130554

We’re looking forward to starting the semester with a Grand Opening next week, and to continuing to advance various efforts, including FermSci and biotinkering, some salon-type events in the planning stages, and a million other things I’m probably forgetting. Onward and upward.

MUSHROOMS!

Babies

Inspired by projects like Ecovative’s building and packaging materials – check out this guide to How to Make Your Own Growth Forms – and in line with our other biotinkering and fermentation science efforts, we’ve been slowly gathering mushroom making gear, including an autoclave…

Pressure

and a laminar flow hood.

Hoodie

The liquid mushroom culture syringes arrived, so we inoculated some sterile rye berry jars.

Innoculated

With any luck, the jars will take, and we’ll be able to begin mass production. Meanwhile, we’re figuring out our new Formech vacuum former, and we think there are opportunities to use it in conjunction with our 3D printers and CNC machines to create custom forms for growing mushrooms in the makerspace.

20181221_130925

But just a little bit.

Took the crocheted SCOBY mat home to dry it out, and kept it overnight in a 120° F oven on parchment paper to dry it out.

SCOBY Mat

The thicker side didn’t quite incorporate itself with the hemp fiber, owing I think to the fact that the crocheted piece was suspended slightly below the high tea/sugar mark.

Microcellulose and Cellulose

In some places though, it seems as though the SCOBY really integrated with the mat.

Texture

The finished piece has an interesting flexibility because of the crocheted core.

Light Emitting

I decided to try using SNO-SEAL, which is beeswax and some sort of solvent, to waterproof the mat. I melted some in an old pan on an outdoor stove, and plunged the SCOBY mat into it.

Structure

As I was turning off the flame, the pan caught fire, which was no big deal, and I extinguished it by putting a piece of metal over it. I didn’t realize, however that the mat itself was on fire, but was able to put it out quickly. I then placed the whole business on parchment paper and into the oven at 120° again for about 20 minutes, then buffed it out with some paper towels.

Beeswaxed

It definitely sheds water.

Our next experiments include creating magnetic SCOBY by incorporating iron filings into some fruit leather mush, and creating “leather” bracers for an upcoming fashion show.

Inspired by the way the fruit leather SCOBY catches the light, we decided to see about embedding LED in a batch of mush. Using the SCOBY from the kombucha of least resistance, we blended up a new batch.

SCOBY of Least Resistance

As the prior batch took so very long to dehydrate, we tried out a yogurt cheese maker, jamming it full of mush and letting it sit overnight to see about driving off as much liquid as possible before air or oven drying.

SCOBY Mush in a Yogurt Cheese Making Thing

A lot of kombucha collected in the bottom after 24 hours. Meanwhile, we prepared four LED, coating the posts in dialectric grease, and using multiple nested layers of heat shrink tubing in an effort to prevent the highly acidic SCOBY mush from corroding the LED legs.

LED for SCOBY

We embedded the LED into the mush, and packed it in all around them. Not sure if the material will capture the LED, or shrink in such a way that they will be easily pulled out, but we’re hoping for the former. After the material dries some, the hope is that it will be a coherent block, which can be removed from the vessel for additional drying.

SCOBYLED