Inspired by this process for turning SCOBY into fruit leather…

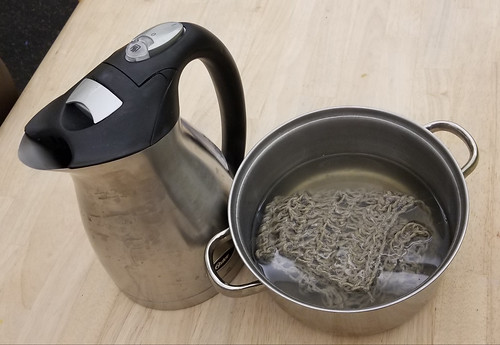
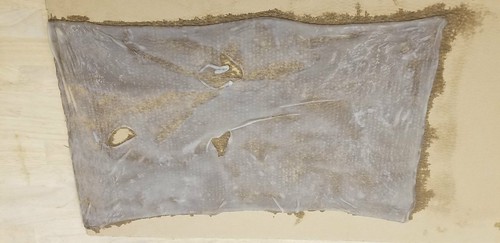
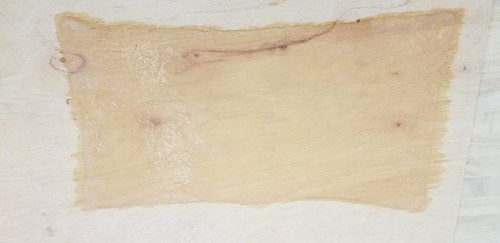
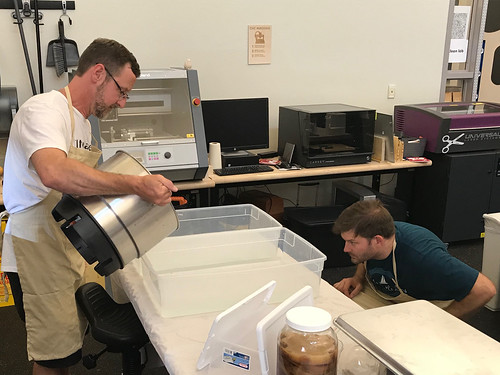
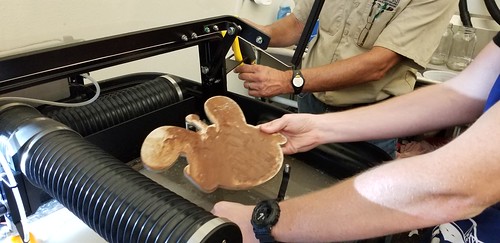
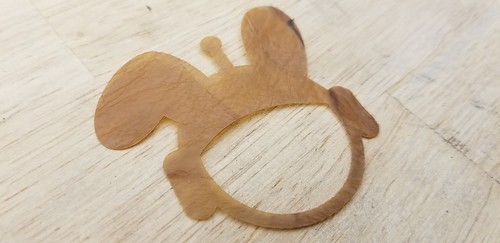
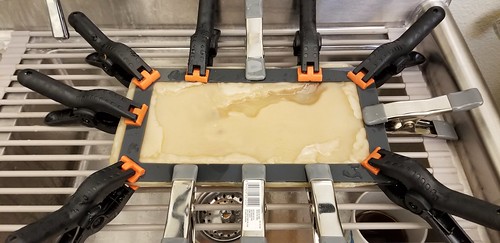
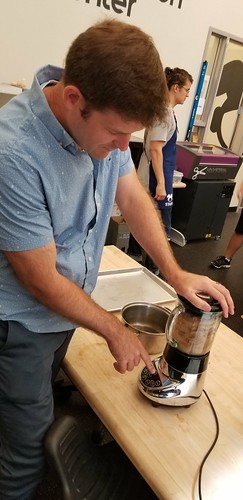
…we decided to prototype a process to turn some mature SCOBY into mush, dry it in a form, and look at the material properties of the finished product. We borrowed a blender and rinsed and blended up a not insignificant quantity of SCOBY, adding a little bit of water to keep things moving.

Max Mixes

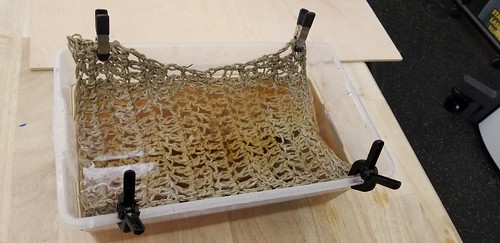
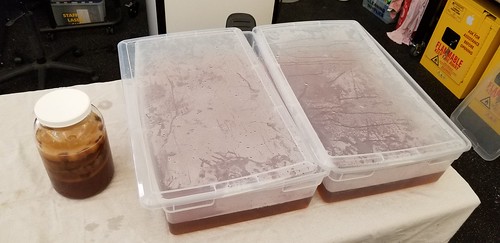
We weren’t able to find exactly the right vessel, so we improvised, building little dam made of wood to get to the size we wanted.

SCOBY Mush

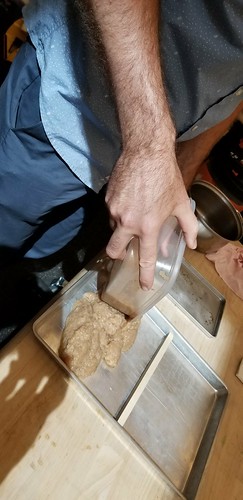
The material is surprisingly coherent, and the dam acted as a bit of a liquid separator.

The Product

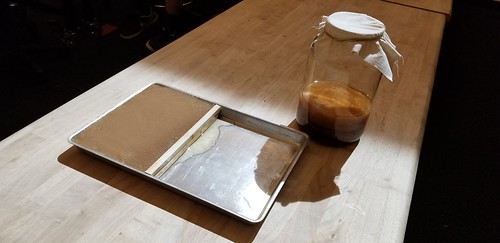
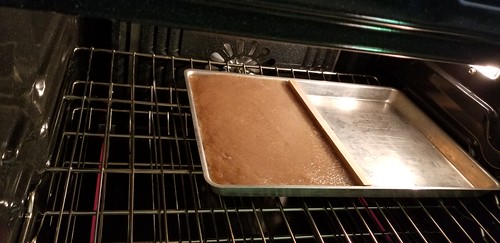
The form filled, we stuck it in the oven at 200 degrees Fahrenheit (the lowest the oven in the nutrition classroom will go), and it’s gently baking even as I’m writing this.

20180829_160708

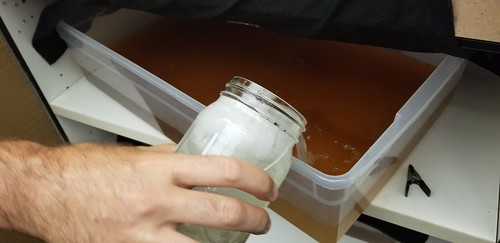
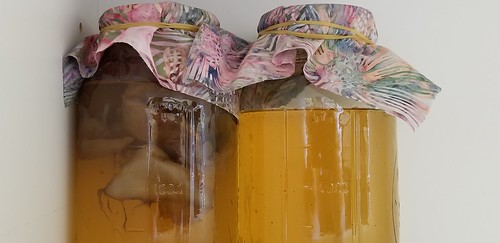
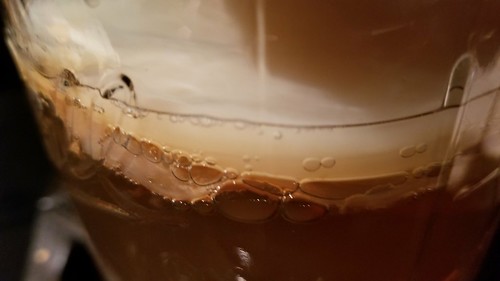
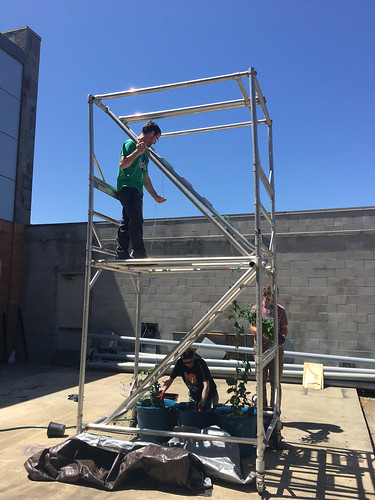
In related news, we modified the fermentation chamber, adding a heat mat to see if we can improve the growth rate of the pellicle by increasing the temperature a bit. The mat has a fixed temp, and as it turns out that temp is too high, so we’ll need to look into adding a thermostat to reign that in a bit. Eventually, we plan to construct an Arduino-based, temperature controlled growing chamber that will will log data to a Web-accessible database, but that’s a few weeks out.

2018-08-29_04-38-56

Boiled up the hemp twine crocheted mat (which when wet smells strongly of goat)…

Boiled Hemp Twine Smells Like Goat

…then used the t-shirt press to flatten it out…

Heat Press = Goat Steam

…and suspended it at the surface of a fresh batch of kombucha.

Suspended

We covered the whole business in a cloth, and put it into the brewing shelf. Not sure at all what might happen, but the hope is that the bacteria and yeast will colonize the twine and produce cellulose all around, encasing the mat in SCOBY goodness.

An update on the sheet SCOBY we harvested the other day…

Pro Tip: Don’t dry your SCOBY directly on plywood.

2018-08-24_06-46-48

The very fine underlayer SCOBY we placed on a sheet of plywood, having seen that technique in a video somewhere – YouTube, maybe? Anyhow, the SCOBY and the plywood largely became one, and so we were only able to get a few pieces of fine parchment-like paper.

2018-08-24_06-46-29

The rougher top layer we draped over cardboard, and while it dried without sticking, it’s a much more fragile product than the original piece we dried some weeks ago.

Rough SCOBY

Fortunately, we’ve got another big sheet growing, so we’ll look at different ways to dry it, and to remove it from the tea solution without letting it separate into layers.

Meanwhile, we’ve discussed different ways that we might incorporate other materials into the growing SCOBY, and landed on the idea of somehow incorporating woven natural hemp twine into the process, and seeing if the bacteria and yeast will colonize the twine. Workshopped the idea with Clarity (student, Innovation Center staff, and fiber arts expert), and she proposed the idea of crocheting the twine to produce a mat. Having no crochet hooks in the shop – we need to remedy that – she found a model and printed one, and set to work creating the mat.

3D Printed Crochet Hook

Work in progress…

SCOBY Hemp Mat

I think we’ll boil the finished product to sterilize it, and then float it somehow at the surface of a kombucha batch, and see what happens.

Finished!

We decided to harvest and dry one of the big SCOBYs today.

Booch Leather

As we removed it from the tea, the SCOBY separated into two layers, which we washed and rinsed.

Washing the SCOBY

The top layer was thick and uneven and prone to tearing as we arranged it on a piece of cardboard to dry.

Top Piece

The bottom layer was thin and unblemished and surprisingly strong. It’s barely visible on the plywood.

Quality SCOBY

We mixed up some sugar water, and added it to both the now empty grow chamber, and to the undisturbed second batch. We’ll wait a week to harvest and cure the SCOBY growing therein.

Hungry Booch

Victoire (Communication and Media Studies) dropped by the lab today, and shared an idea she had about creating a puzzle as part of her Group Communications class in the fall. She brought with her a piece of paper with the “Everybody, Somebody, Anybody, and Nobody” story on it, and talked about turning it into a puzzle. We quickly got to prototyping, first on paper, kicking around ideas about the sizes of the words, the individual pieces, and the puzzle overall. We fired up Illustrator to create version 1, which we laser cut on 1/8″ hobby plywood.

Victoire Designs

We immediately agreed that the pieces were too small, the words not legible enough. Back to the drawing board, where we more or less quadrupled the size of the pieces, and changed the letters from vector outlines to raster engraves.

20180809_154858

This version felt more or less right, and then I remembered a project Jeremy (Making Social Change student) had done maybe a year ago, spray painting plywood and then laser engraving that for a white-on-black effect. We happened to have a piece of prepared plywood, which turned out to be the best of the bunch.

Puzzling

After test driving the puzzle, Victoire was satisfied with how it felt, and she was able to set up the laser job and produce enough puzzles to take with her for the first day of class in a couple of weeks.

20180809_161535

Victoire walked in with an idea, and walked out with a v1 prototype about an hour and a half later, feeling super charged up and empowered. Priceless.

Given the exciting potential for using SCOBY as a makerspace material, we spent the day brewing up a big batch of kombucha to grow large SCOBY sheets. Using an electric water bath canner, we boiled 5.25 gallons of water, then cooled it down using Max’s wort chiller.

Wort Chiller

We divided the water into two large plastic bins that CJ (student and makerspace employee) cleaned and sterilized for the project.

Pouring

In a separate pot, we brewed 8 quarts of tea, then added the sugar, and divided that between the two bins. The temperature was a little high – 91 degrees Fahrenheit or so – so we waited a loooong time while it cooled before adding some finished kombucha.

Big Batch of Booch

In the meantime, Clarity (student and makerspace employee) quickly and skillfully embroidered this SCOBY cozy to cover the batch while it ferments.

SCOBY Cozy

We put the two big batches to bed in a dark and warm place to ferment for the next couple of weeks. With any luck, we’ll have two big pieces of SCOBY to work with right around the start of the semester.

Don't Booch Open Inside

While we had all the supplies out, we decided to make a batch of kombucha of least resistance. We took ordinary tap water, poured in some sugar and shook it up, and then added a tea bag for a short while, removed it, and then added to each jar an amount of finished kombucha, and in one jar, the unused SCOBYs from the first kombucha leather batch.

Kareless Kombucha

We’ll see if and how well this low-effort kombucha works out. Throughout the day, we took notes about how we can scale the activity up for some fall workshops as part of our fermentation science initiative. Brett (student and makerspace employee) is working on plans for a temperature-controlled fermentation chamber, so we’ll be able to add some microcontrollers to monitor and control our ferments, with the goal of producing and lot of SCOBY for lots of experimentation.

Power and plumbing improvements completed, our new ProtoMAX abrasive waterjet cutter is ready to roll, and Hayes (student and makerspace employee) has really stepped up and figured it out. Here’s the first run, our mascot Nova rendered in the cheapest possible ceramic tile.

Tom, who did the plumbing for both the water jet and our sink, and who is an accomplished wood turner, was there for the first cut.

20180731_150726

The finished product.

Nova Rendered in Tile

Though small, the ProtoMAX enables us to cut a variety of materials that we wouldn’t be able to otherwise, including tile and stone of various kinds, and metal, which students seem to really want to do. Looking forward to getting to know this machine!

Ran some laser tests on the kombucha leather. Specifically, we wanted to test raster and vector engraving, and vector cutting. We used the Natural -> Paper -> Construction Paper setting in the laser driver, and cooked up a test file using our mascot Nova.

The material wasn’t perfectly flat, so the raster engrave worked, but inconsistently. The vector engrave left a crisp line on the material, but it could be easily scratched away with a fingernail.

Laser Engraved SCOBY Leather

The vector cut worked well, the edges crisp and clean. The surface of the material is textured in an interesting way, and really resembles skin.

Laser Cut SCOBY Leather

Tomorrow we’re going to try to start some kombucha in larger vessels – we’re going to need a lot of SCOBY!

As part of an effort to integrate biology and biohacking into our makerspace offerings, we’ve been working on a fermentation science initiative, which will hopefully lead to workshops, activities, courses, and certificates. Fermentation science sits at the intersection of a number of disciplines, including Biology, Chemistry, and Nutrition, and with the addition of Internet of Things technologies for monitoring and automation, dovetails nicely with our ongoing aquaponics and smart garden efforts.

We’ve started experimenting with kombucha, with the goal of exploring the kombucha SCOBY as a renewable and novel makerspace material, inspired by Scihouse’s SCOBY leather experiments.

We’ve been fostering some kombucha SCOBYs…

SCOBY!

and eventually grew one out in a small rectangular vessel. We knocked together an acrylic drying rack on the laser cutter, and set the SCOBY to dry.

SCOBY Drying

It’s a little rough, but it is after all a version 1 prototype.

It Rubs The Lotion On Its SCOBY

We’re planning to develop an incubation box so that we can manipulate temperature variables, and have talked about all kinds of basic science sorts of experiments to see how far we can take the material.  We’re also developing workshops around lactic acid fermentation, and have created some nice krauts and ferments over the past month, including this red cabbage. Lots of opportunities to science this up too, and to monitor, tweak, and manipulate variables.

Purple Cabbage Ferment

Our eventual goal is to stand up a brewing program that should integrate nicely with the college’s viticulture efforts. We’ve got some work to do to get that up on wheels, but we’re nibbling around the edges by, for instance, growing hops. We repurposed some scaffolding – most recently the art gallery for our Making Social Change laser cut stencil project – as a hops yard.

Hops Tower

Despite some ups and downs with the automatic watering, one of the plants is flowering! Pro tip: raw hops cones are incredibly bitter.

Hops, Flowering

Stay tuned for Innovation Center Makerspace MicroTechno Brew.

Innovation Center Brew

With the semester over, we’ve had some time to regroup and plan for the fall. One of our main goals this summer is to make sure that each staff member is comfortable on each fabrication process and machine. To accomplish this goal, the person most fluent in a particular process – 3D printing, or woodworking and power tools, for instance – is responsible for cross training all of the other staff.

2018-06-06_06-30-31

Clarity (student and makerspace staff) is an accomplished fiber artist, and she’s been the point person for sewing in the Innovation Center since the Making Social Change class last fall. Her group created the A-Z of Planned Parenthood quilt for their final project, and she has become quite skilled at using our Baby Lock embroidery machine, most recently using it to create the embroidered bean bags…

Beanbags

…for the cornhole game we brought to Maker Faire.

2018-05-18_06-35-54

As the resident expert, she’s been training up the other staff, and today, she spent the day working with Nicole (student and makerspace staff) to create a really amazing canvas tote with an image of Nicole’s Mom’s cat on it. Requiring multiple thread changes and lots of tweaking in the embroidery software, it took quite a while, and Nicole now feels confident in helping makerspace visitors through the embroidery process. The resulting artifact is truly magnificent!

12 Color Embroidered Cat

flickr gallery of work-in-progress photos:

Cat Embroidery